
Amplifier - power
- Make
- Land Rover
- Model
- Discovery II (UK)
- Section
- Repairs › Amplifier - power
‹ Prev Speaker - mid range - front door Speaker - high range - rear doorNext › Speaker - tail door CD autochanger
In car entertainmentAmplifier - power
Amplifier - power
$% 86.50.36
Remove
- Release fixings and remove battery cover.
- Disconnect battery earth lead.
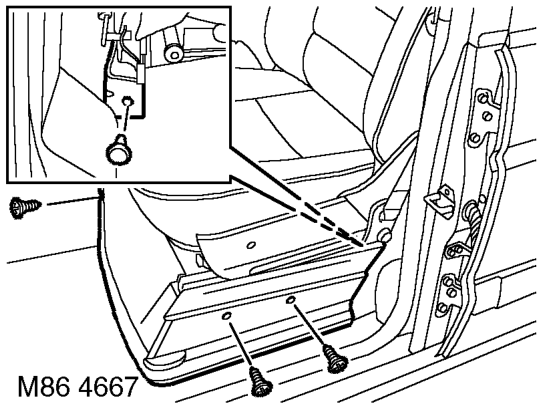
- Remove 3 screws and 1 trim clip securing lower trim casing to LH front seat.
- Remove lower trim casing.
- Move seat fully rearwards.
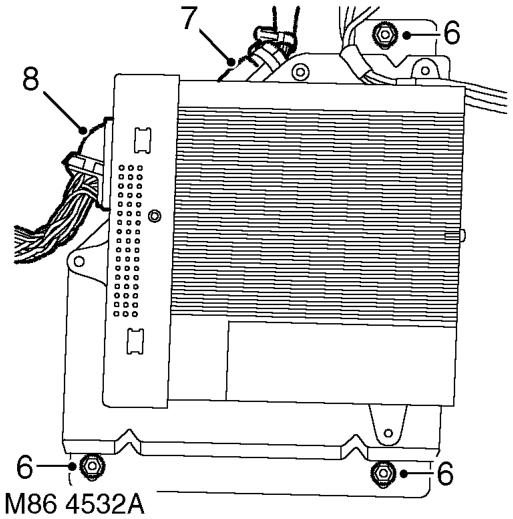
- Remove 3 nuts securing power amplifier mounting bracket to body.
- Release mounting bracket and, if applicable, disconnect multiplug from EAT ECU on underside of bracket.
- Disconnect multiplug from power amplifier.
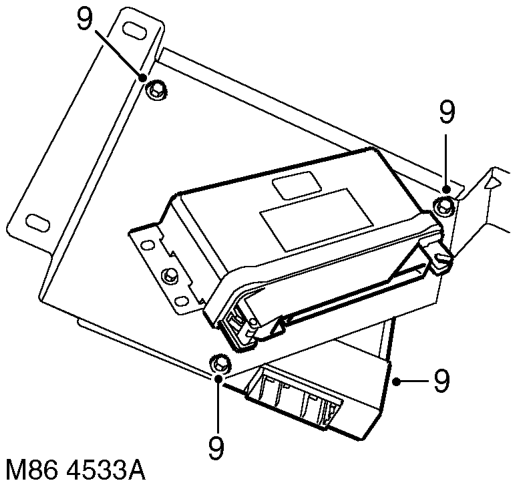
- Remove 3 screws securing power amplifier to mounting bracket and remove power amplifier.
Refit
- Fit power amplifier to mounting bracket and secure with screws.
- Position power amplifier and mounting bracket to body and connect power amplifier multiplug. If applicable, also connect EAT ECU multiplug.
- Fit bracket to body mountings and secure with nuts.
- Position lower trim casing to seat and secure with fixings.
- Connect battery earth lead.
- Fit battery cover and secure with fixings.
‹ Prev Speaker - mid range - front door Speaker - high range - rear doorNext › Speaker - tail door CD autochanger
Parts & tools for this job For Land Rover Discovery
- TOOLTorque wrenchSearch: 3/8 inch torque wrench
- TOOLSocket setSearch: socket set metric
- BOOKHaynes manualSearch: Haynes manual Land Rover Discovery
Links open Amazon search results in a new tab. As an Amazon Associate I earn from qualifying purchases.