
Differential assembly (page 5 of 5)
- Make
- Land Rover
- Model
- Discovery II (UK)
- Section
- Overhaul
Rear axleDifferential assembly · page 5 of 5
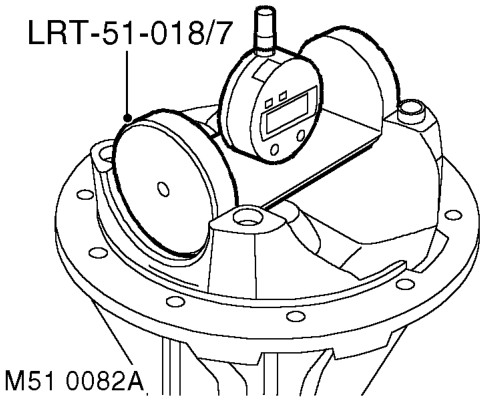
- Align setting gauge LRT-51-018/7 to setting block, rock gauge to obtain minimum reading. If reading is lower than required reading, decrease shim size. If reading is higher than required reading, increase shim size.
- Using LRT-51-003 to restrain pinion flange, remove bolt and washer. Remove pinion flange.
- Remove pinion, collect tail bearing and tail bearing shim.
- Remove pinion head bearing outer race and shim. Discard shim. Ensure bearing race recess is clean and free from burrs.
- Fit calculated shim, and using LRT-51-018/4 fit head bearing outer race.
- Fit pinion, pinion tail bearing and tail bearing shim.
- Fit pinion flange and bolt and washer. Using LRT-51-003 to restrain pinion flange, tighten bolt to 100 Nm (74 lbf.ft).
- Rotate pinion in both directions to settle bearings.
- Recheck pinion Torque to Turn, adjust if necessary.
- Recheck pinion head height.
- Using LRT-51-003 to restrain pinion flange, remove bolt and washer. Remove pinion flange.
- Discard bolt.
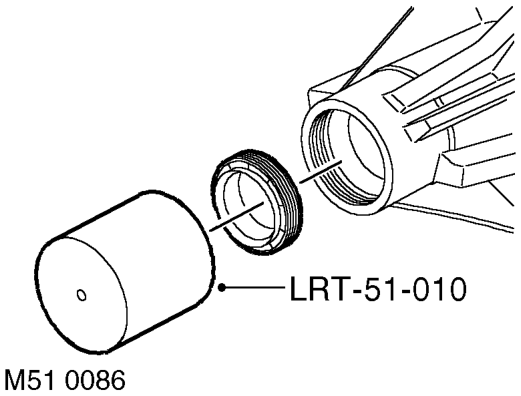
- Using LRT-51-010 fit pinion seal.
- Ensure spacer and tail bearing are correctly located.
- Fit pinion, pinion flange and washer.
- Fit new pinion flange bolt and tighten to 100 Nm (74 lbf.ft).
- Lightly oil differential bearings.
- Ensure spring dowels are fitted in bearing caps.
- Fit differential bearing outer races and locate differential assembly into housing.
- Fit bearing caps and tighten bolts to 10 Nm (7.5 lbf.ft).
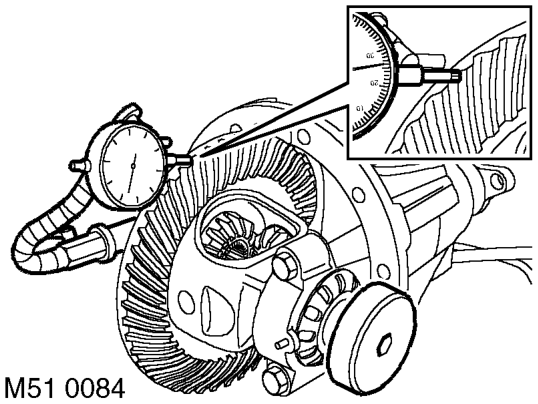
- Fit adjusting nuts, tighten crown wheel side nut to 22 Nm (16 lbf.ft). Ensure opposing nut is loose.
- Position DTI to check crown wheel backlash. Adjust opposing nut to obtain correct crown wheel backlash.
- Rotate pinion in both directions to settle bearings.
- Measure in 3 places to obtain correct crown wheel backlash. NOTE: Crown wheel backlash should be within 0.076 mm - 0.177 mm (0.003' - 0.007').
- Align adjusting nuts to next roll pin slot, do not loosen nuts to align slots.
Parts & tools for this job For Land Rover Discovery
- PARTRear wheel bearingSearch: Land Rover Discovery rear wheel bearing
- TOOLBearing puller kitSearch: wheel bearing puller kit
- PARTCV boot kitSearch: Land Rover Discovery cv boot kit
Links open Amazon search results in a new tab. As an Amazon Associate I earn from qualifying purchases.