
Glass - alpine light
- Make
- Land Rover
- Model
- Discovery II (UK)
- Section
- Repairs › Glass - alpine light
Refit
Glass - alpine light
$% 76.81.52
Introduction
The following equipment is required: l Cutting wire and handles. l Kent cutting knife. l Glazing knife. l Windscreen repair kit. l Sealant applicator gun. l Suction cups. l A felt covered table or stand to support glass.
WARNING: Wear protective gloves when handling glass, solvents and primers.
WARNING: Wear suitable eye protection when removing and refitting glass.
Remove
- Fit protection to exterior body work adjacent to glass.
- Fit cover over adjacent body work.
- Fit protection to internal trim adjacent to glass.
- Cover interior of vehicle with protective sheet.
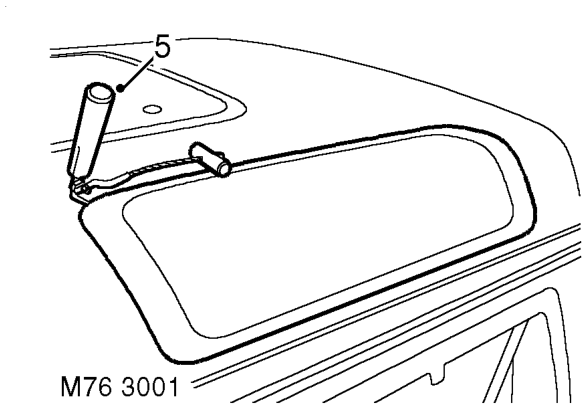
- Fit pre-cut nozzle to sealant cartridge, remove
- From outside of vehicle, use a Kent knife and carefully cut through sealant to release glass from body. Any remaining sealant not accessible with Kent knife can be severed using cutting wire or knife.
CAUTION: Hold the cutting wire as close to the glass as possible to prevent damage to the body and surrounding trim.
- Remove glass.
CAUTION: Lay glass on felt covered supports and be careful not to damage the obscuration band. Do not stand on edge as this can cause chips which subsequently
- Apply a continuous bead of sealant to sealant
develop into cracks.
- Carefully remove sealant from body to leave a smooth surface.
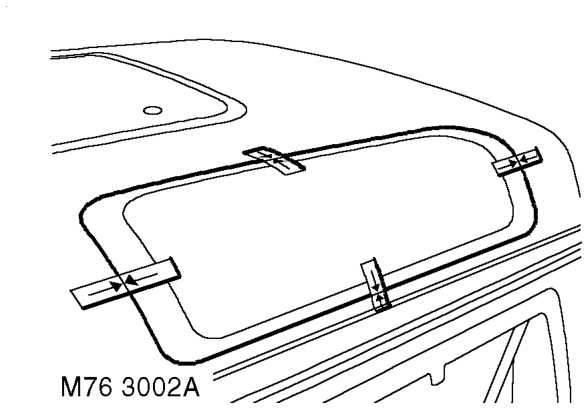
- With assistance, fit glass without sealant to body and apply masking tape to establish reference marks as an alignment aid.
- Remove glass and place aside.
- Clean body and sealant face on glass with solvent.
CAUTION: Do not touch cleaned or primed surfaces with fingers.
- Apply etch primer to any bare metal on body.
- Apply glass primer to sealant face on glass and allow to cure.
- Apply primer over etch primer on body.
- Apply activator over old sealant on body.
- Allow activator to cure.
lid, shake out crystals, and fit cartridge to applicator gun. If necessary modify the nozzle to achieve required bead section.
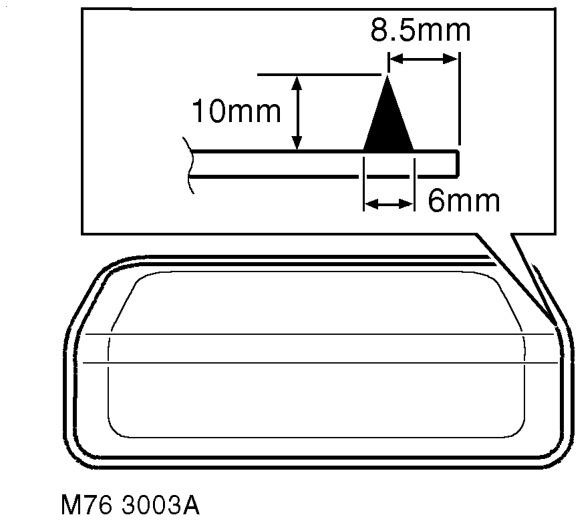
face on glass as shown.
Parts & tools for this job For Land Rover Discovery
- TOOLTrim removal tool kitSearch: trim removal tool kit
- PARTTouch-up paintSearch: Land Rover touch up paint
- PARTPanel clip assortmentSearch: Land Rover panel clips assortment
Links open Amazon search results in a new tab. As an Amazon Associate I earn from qualifying purchases.