
Windscreen (page 2 of 2)
- Make
- Land Rover
- Model
- Discovery II (UK)
- Section
- Repairs
ScreensWindscreen · page 2 of 2
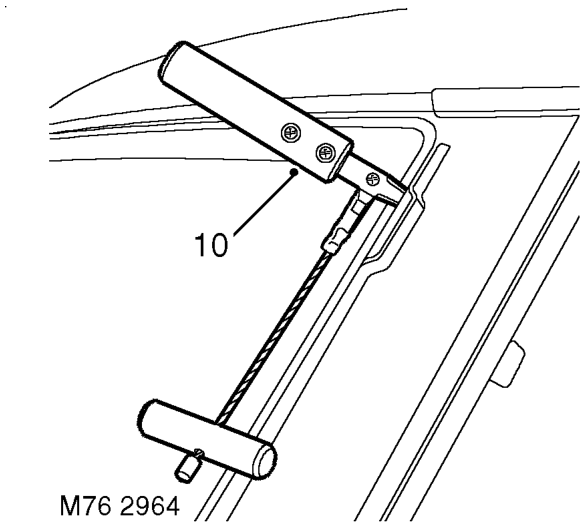
- From outside of vehicle, use a Kent knife and carefully cut through sealant securing sides of screen to body.
- Using suitable cutting wire, with assistance if required, carefully cut through sealant securing top of screen to body and any remaining sealant at sides.
CAUTION: Hold the cutting wire as close to the glass as possible to prevent damage to the body and surrounding trim.
- Cut through sealant securing lower edge of screen to body with glazing knife.
- Attach suction cups and use assistance to remove glass from body.
CAUTION: Lay glass on felt covered supports and be careful not to damage the obscuration band. Do not stand on edge as this can cause chips which subsequently develop into cracks.
- Collect screen support block.
Refit
- Carefully remove sealant from body to leave a smooth surface.
- Use a vacuum cleaner to clear away any waste.
- Original glass: Carefully cut back old sealer to obtain a smooth surface without damaging obscuration band on glass. Fit new top finisher to screen.
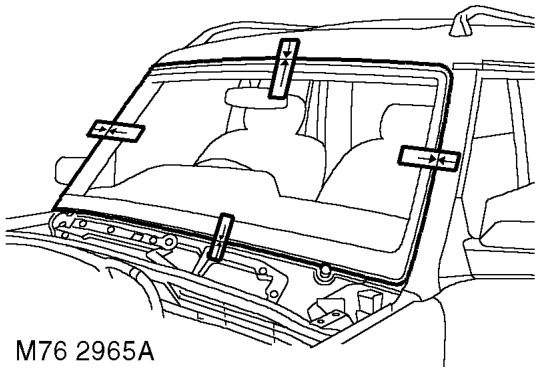
- Fit screen support block to body.
- With assistance, locate screen to body.
- Apply masking tape to establish reference marks as an alignment aid.
- With assistance, remove screen and place aside.
- Clean body and sealant face on screen with solvent.
CAUTION: Do not touch cleaned or primed surfaces with fingers.
- Apply etch primer to any bare metal on frame.
- Apply screen primer to sealant face on screen and allow to cure.
- Apply primer over etch primer on body.
- Apply activator over old sealant on body.
- Allow activator to cure.
- Fit pre-cut nozzle to sealer cartridge, remove lid, shake out crystals and fit cartridge to applicator gun. If necessary modify the nozzle to achieve required bead section.
Parts & tools for this job For Land Rover Discovery
- TOOLTorque wrenchSearch: 3/8 inch torque wrench
- TOOLSocket setSearch: socket set metric
- BOOKHaynes manualSearch: Haynes manual Land Rover Discovery
Links open Amazon search results in a new tab. As an Amazon Associate I earn from qualifying purchases.