
Latch - front door - 3 door
- Make
- Land Rover
- Model
- Freelander Body Repair Manual
- Year
- 1998 on
- Section
- Doors › Latch - front door - 3 door
BodyLatch - front door - 3 door
LATCH - FRONT DOOR - 3 DOOR
Service repair no - 76.37.12
Remove
- Remove upper water shedder. See this section.
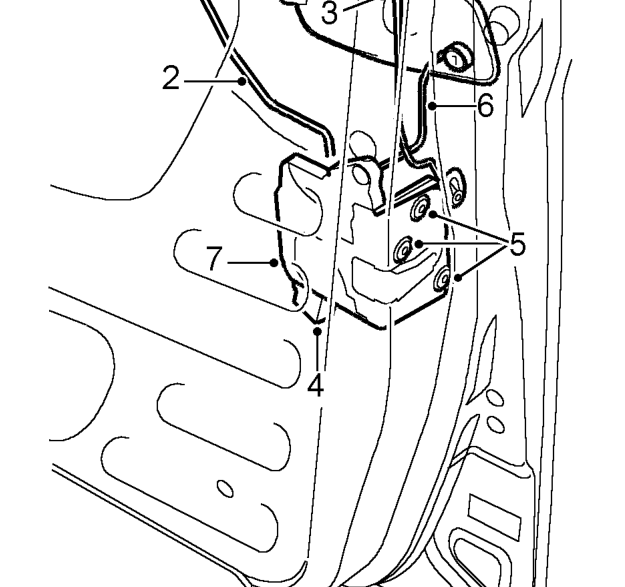
- Remove sill button lock rod from latch.
- Release control rod from exterior handle.
- Disconnect multiplug from latch.
- Remove 3 Torx screws from latch
- On driver’s door, release door lock barrel paddle from latch.
- Remove latch from aperture.
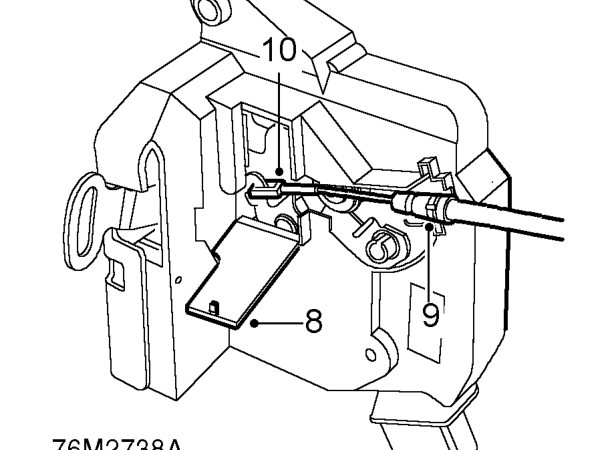
- Open latch security flap.
- Release interior release cable clamp from latch.
- Disengage interior release cable from latch.
Refit
- Secure interior release cable to latch and close latch security flap.
- Fit interior release cable clamp to latch.
- Position latch to door. On driver’s door, align lock barrel paddle to latch.
- Fit and tighten Torx screws securing latch.
- Connect multiplug to latch.
- Connect exterior handle control rod to latch.
- Fit sill button lock rod to latch.
- Check operation of latch.
- Fit front door water shedder. See this section.
Parts & tools for this job For 1998 Land Rover Freelander
- TOOLTrim removal tool kitSearch: trim removal tool kit
- PARTTouch-up paintSearch: Land Rover touch up paint
- PARTPanel clip assortmentSearch: Land Rover panel clips assortment
Links open Amazon search results in a new tab. As an Amazon Associate I earn from qualifying purchases.