
Oil pressure switch
- Make
- Rover
- Model
- 400 Workshop Manual
- Year
- 1995–2000
- Section
- Repairs › Oil pressure switch
Engine - D SeriesOil pressure switch
OIL PRESSURE SWITCH
Service repair no - 12.60.50
Remove
- Raise front of vehicle.
WARNING: Support on safety stands.
- Remove oil filter. See this section.
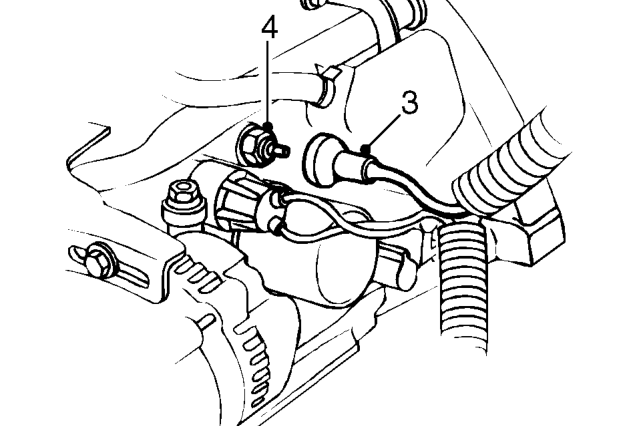
- Pull back rubber cover and disconnect lead from oil pressure switch.
- Remove oil pressure switch.
Refit
- Clean threads of oil pressure switch and apply Loctite 577 sealant.
- Fit oil pressure switch and tighten to 18 Nm.
- Connect lead to switch terminal and fit rubber cover over switch.
- Fit oil filter. See this section.
- Remove stand(s) and lower vehicle.
OIL FILTER
Service repair no - 12.60.04
Remove
- Raise front of vehicle.
WARNING: Support on safety stands.
- Clean area around filter head and place a container beneath engine.
- Using a strap wrench, unscrew and discard filter.
Refit
- Clean mating face of filter head.
- Lubricate sealing ring of new filter with clean engine oil.
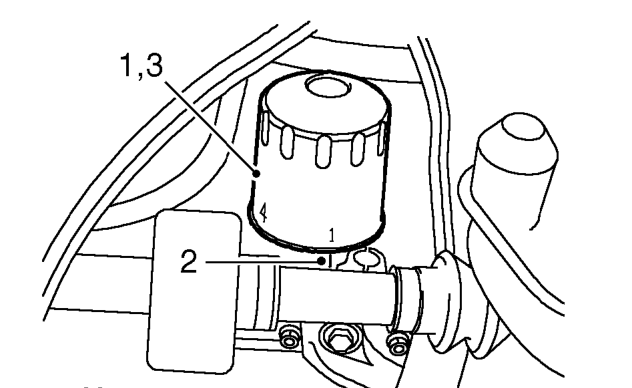
- Fit new filter and tighten by hand until it seats.
- Make a mark on block to align with number underneath filter.3
- Tighten filter a further 3 numbers ( /4 turn): 1 turn to 4 2 turn to 1 3 turn to 2 4 turn to 3
- Remove stand(s) and lower vehicle.
- Fill engine with correct specification 10w/40 engine oil until level is correct. See INFORMATION, Capacities, fluids and lubricants.
- Start and run engine and check for leaks.
- Stop engine, wait a few minutes, then check oil level. Top-up if necessary.
Parts & tools for this job For 1995 Rover 400
- TOOLOBD2 scannerSearch: OBD2 scanner
- TOOLDigital multimeterSearch: automotive digital multimeter
- TOOLBack-probe test leadsSearch: back probe test leads
Links open Amazon search results in a new tab. As an Amazon Associate I earn from qualifying purchases.