
Remove
- Make
- Rover
- Model
- Coupé, Cabriolet & Tourer 200/400 Coupé, Cabriolet & Tourer Workshop Manual
- Section
- Screens › Remove
BodyRemove · page 1 of 2
Service Repair No. 76.81.20
Note: The following equipment is required:
Sharp knife or cutting wire and handles.
Windscreen repair kit.
Sealer applicator gun.
Suction cup lifter.
Leak test equipment.
Remove
- Remove 'D/E' post finisher, see 'D/E' post finisher – Tourer.
- Attach suction cup to glass.
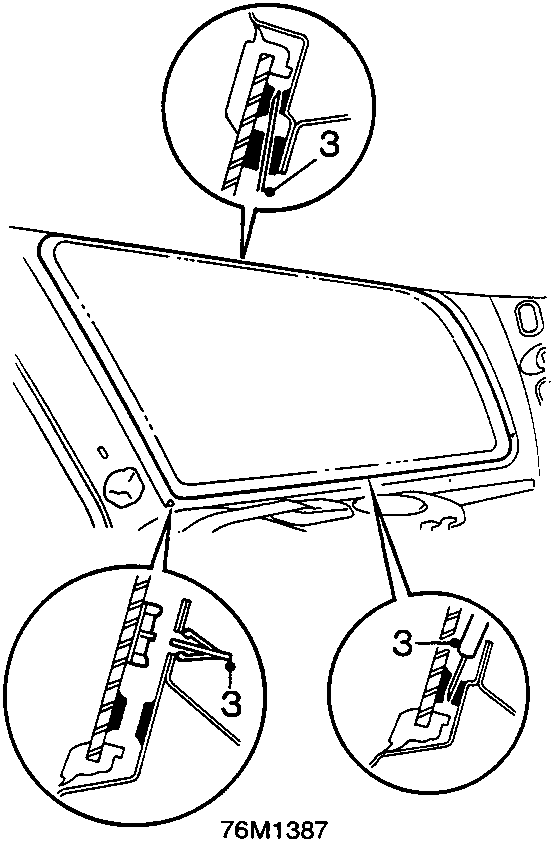
- Use a knife from inside, insert knife through sealer at centre front and work down and round, cutting through clip at bottom front corner and adhesive foam strip along the top of the glass.
Alternatively use cutting wire:
Apply masking tape to body edge at top and bottom of glass. Cut round glass starting at front and use a knife to cut through clip. - Retain glass as sealer is cut free and remove rear quarter glass.
- Extract end of clip from body panel.
Refit
- Carefully cut old sealer on body flange to obtain a smooth surface 2 mm thick, remove any loose sealer. Do not cut down to painted surface.
- Renew moulding clips as necessary.
CAUTION: Lay glass panel on felt covered supports. Any chipping of glass edge may develop into cracks.
- Apply cleaning solvent to body flange and to sealing surface on glass panel. DO NOT TOUCH CLEANED OR PRIMED SURFACES WITH FINGERS.
- Shake primer tins for 30 seconds. Apply Body Primer to sealing surface on flange and to any bare metal.
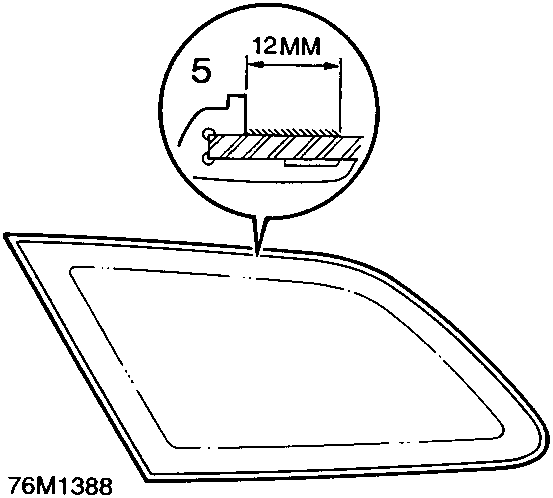
- Apply Glass Primer to 12 mm wide sealing surface on glass moulding as shown. Use clean gauze to wipe off primed surfaces when dry.
CAUTION: Use a new sponge for each primer.
- Fit pre – cut nozzle to sealer cartridge, remove lid and shake out crystals and install in applicator gun.
Parts & tools for this job For Rover Coupé, Cabriolet & Tourer
- TOOLTrim removal tool kitSearch: trim removal tool kit
- PARTTouch-up paintSearch: Rover touch up paint
- PARTPanel clip assortmentSearch: Rover panel clips assortment
Links open Amazon search results in a new tab. As an Amazon Associate I earn from qualifying purchases.