
Evaporator and motor assembly - rear
- Make
- Land Rover
- Model
- Discovery II (UK)
- Section
- Repairs › Evaporator and motor assembly - rear
Air conditioningEvaporator and motor assembly - rear · page 1 of 2
Evaporator and motor assembly - rear
$% 82.26.21
Remove
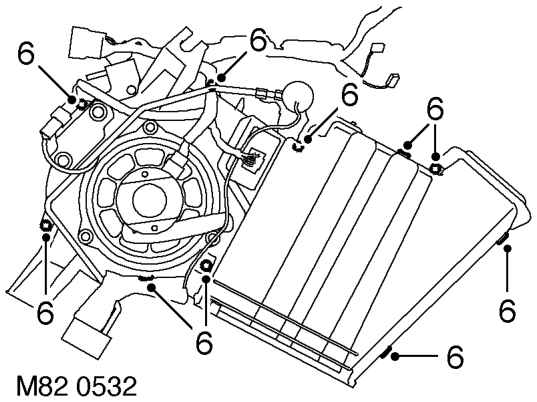
- Remove 6 screws and 4 clips securing main casing and remove top half of casing.
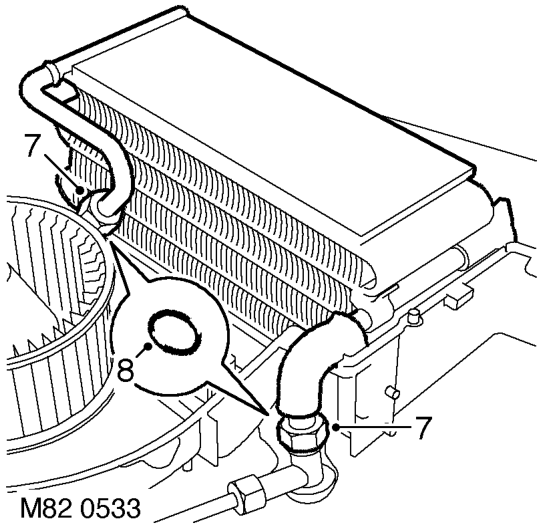
- Loosen and release evaporator pipes unions, release pipes and remove evaporator.
- Remove and discard evaporator pipe 'O' rings.
Refit
- Lubricate new 'O' rings with clean refrigerant oil and fit to evaporator pipes
- Position evaporator, connect pipes and tighten unions.
- Position main casing and secure with clips and screws.
- Position lower part of casing and secure with screws.
- Fit ducting seal
- Secure relay to support bracket.
- Fit insulation to TXV.
- Fit evaporator assembly. AIR CONDITIONING, REPAIRS, Evaporator and motor assembly - rear.
- Depressurise air conditioning system. AIR CONDITIONING, REFRIGERANT RECOVERY, RECYCLING AND RECHARGING, Refrigerant recovery, recycling and recharging.
- V8 models: Remove 4 clips securing rear exhaust heat shield and remove heat shield.
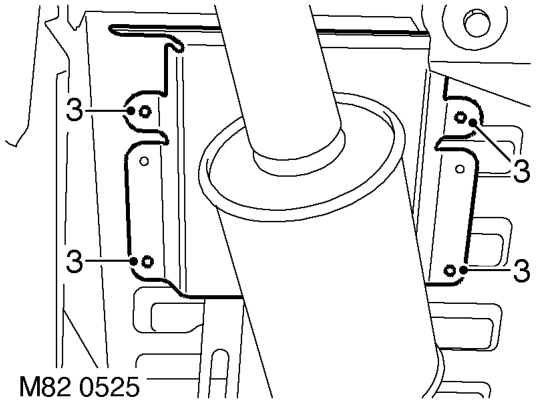
- Remove 2 bolts securing high and low pressure pipes, release pipes and discard 'O' rings.
CAUTION: Always fit plugs to open connections to prevent contamination.
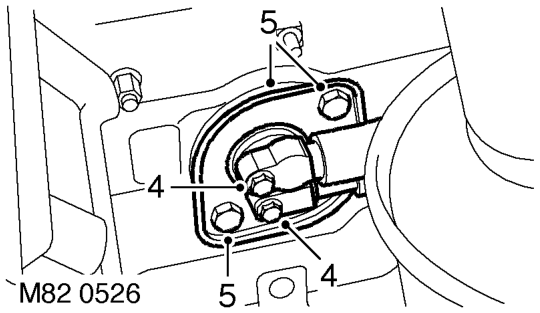
- Remove 2 bolts securing grommet flange to body and remove flange.
- Remove LH rear lower trim casing. INTERIOR TRIM COMPONENTS, REPAIRS, Trim casing - side - loadspace.
- Remove 5 bolts securing seat support bracket and remove bracket.
Parts & tools for this job For Land Rover Discovery
- TOOLA/C manifold gauge setSearch: AC manifold gauge set
- TOOLUV leak detection kitSearch: AC UV leak detection kit
- PARTCabin filterSearch: Land Rover Discovery cabin filter
Links open Amazon search results in a new tab. As an Amazon Associate I earn from qualifying purchases.