
Fan - condenser (page 3 of 3)
- Make
- Land Rover
- Model
- Discovery II (UK)
- Section
- Repairs
Air conditioningFan - condenser · page 3 of 3
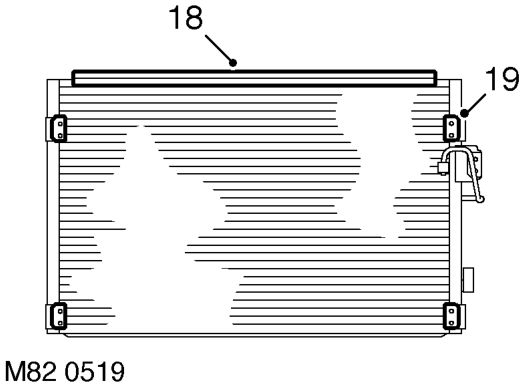
- Remove sealing strip from outer upper seam of condenser.
- Remove captive nut plates from condenser.
Refit
- Fit captive nut plates to new condenser.
- Fit seal to condenser.
- Fit RH mounting bracket to condenser and secure with bolt.
- Fit receiver drier bracket assembly and secure with bolts.
- Ensure condenser pipe and new receiver drier connections are clean.
- Lubricate new 'O' ring with refrigerant oil and fit to condenser pipe.
- Fit receiver drier to bracket and condenser pipe. Tighten bolt securing condenser pipe to 5 Nm (3.7 lbf.ft). Fit clamping bolt securing receiver drier to bracket and tighten to 5 Nm (3.7 lbf.ft).
- Ensure adaptor block and receiver drier connections are clean.
- Lubricate new 'O' ring with refrigerant oil and fit to adaptor block.
- Fit adaptor block to receiver drier and tighten bolt to 5 Nm. (3.7 lbf.ft).
- Fit condenser assembly.
- Fit cooling fan to condenser and fit bolts to secure support rails to condenser brackets.
- Ensure connections of condenser, receiver drier and evaporator pipes are clean.
- Lubricate new 'O' ring seals with refrigerant oil and fit one seal to each evaporator pipe.
- Connect evaporator pipes and tighten bolts to 5 Nm (3.7 lbf.ft).
- Connect multiplug to dual pressure switch.
- Fit radiator. l COOLING SYSTEM - Td5, REPAIRS, Radiator. l COOLING SYSTEM - V8, REPAIRS, Radiator.
- Recharge A/C system. AIR CONDITIONING, REFRIGERANT RECOVERY, RECYCLING AND RECHARGING, Refrigerant recovery, recycling and recharging.
Parts & tools for this job For Land Rover Discovery
- TOOLA/C manifold gauge setSearch: AC manifold gauge set
- TOOLUV leak detection kitSearch: AC UV leak detection kit
- PARTCabin filterSearch: Land Rover Discovery cabin filter
Links open Amazon search results in a new tab. As an Amazon Associate I earn from qualifying purchases.