
Sensor - heated oxygen (HO2S) - post- catalytic converter
- Make
- Land Rover
- Model
- Discovery II (UK)
- Section
- Repairs › Sensor - heated oxygen (HO2S) - post- catalytic converter
‹ Prev Sensor - heated oxygen (HO2S) - pre- catalytic converterNext › Control Valve - Secondary Air Injection (SAI)
Emission control - V8Sensor - heated oxygen (HO2S) - post- catalytic converter
Refit
Sensor - heated oxygen (HO2S) - post- catalytic converter
$% 19.22.17
Remove
- Raise vehicle on ramp.
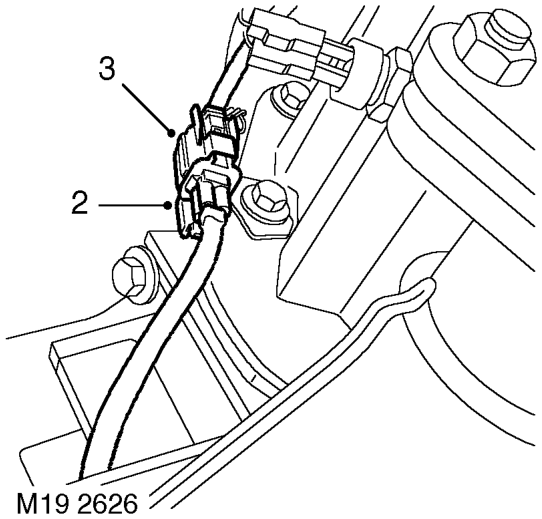
- Release HO2S multiplug from support bracket.
- Disconnect HO2S multiplug from harness.
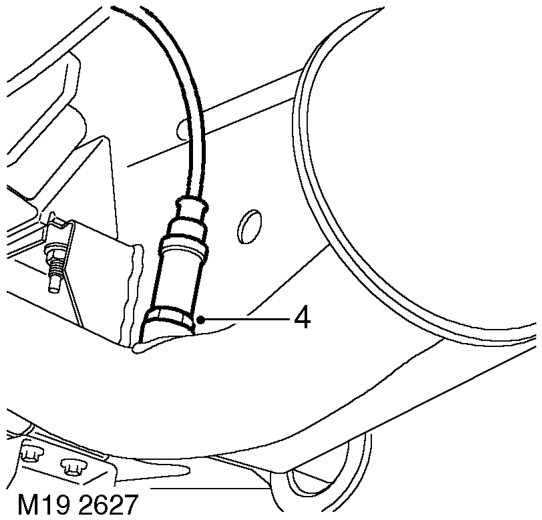
- Using a 22 mm crowsfoot spanner, remove HO2S.
CAUTION: HO2 sensors are easily damaged by dropping, excessive heat or contamination. Care must be taken not to damage the sensor housing or tip.
- Clean sensor and exhaust pipe mating surfaces.
- If refitting existing sensor, apply anti-seize compound to sensor threads.
WARNING: Some types of anti-seize compound used in service are a health hazard. Avoid skin contact.
NOTE: A new HO2 sensor is supplied pre- treated with anti-seize compound.
- Fit a new sealing washer to HO2S
- Fit HO2S and tighten to 45 Nm (33 lbf.ft).
- Connect HO2S multiplug to harness and fit harness to bracket.
- Secure harness to clip.
- Lower vehicle.
‹ Prev Sensor - heated oxygen (HO2S) - pre- catalytic converterNext › Control Valve - Secondary Air Injection (SAI)
Parts & tools for this job For Land Rover Discovery
- PARTOxygen sensorSearch: Land Rover Discovery oxygen sensor
- TOOLOxygen sensor socketSearch: oxygen sensor socket
- TOOLOBD2 scannerSearch: OBD2 scanner
Links open Amazon search results in a new tab. As an Amazon Associate I earn from qualifying purchases.