
Engine coolant temperature (ect) sensor
- Make
- Rover
- Model
- 400 Workshop Manual
- Year
- 1995–2000
- Section
- Repairs › Engine coolant temperature (ect) sensor
Engine management system - EDCEngine coolant temperature (ect) sensor
ENGINE COOLANT TEMPERATURE (ECT) SENSOR
Service repair no - 18.30.10
Remove
- Disconnect battery earth lead.
- Remove engine acoustic cover. See BODY, Exterior fittings.
- Loosen coolant filler cap to release pressure, protect hands if system is hot.Position absorbent cloth around coolant temperature sensor to absorb any coolant spillages.
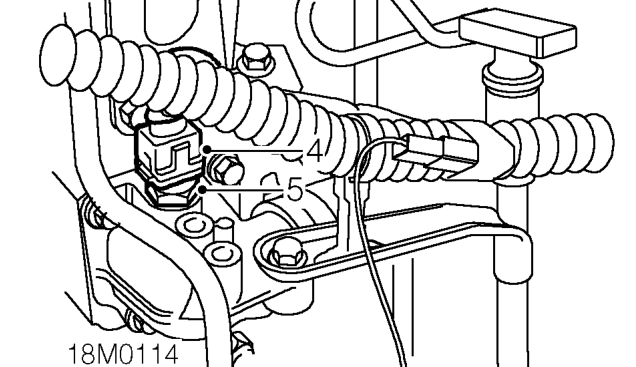
- Disconnect multiplug from coolant temperature sensor.
- Using 19mm socket, remove coolant temperature sensor.
Refit
- Clean threads of coolant temperature sensor and apply Loctite 577.
- Fit coolant temperature sensor and tighten to 5 Nm.
- Connect multiplug to coolant temperature sensor. Remove cloth.
- Fit engine acoustic cover. See BODY, Exterior fittings.
- Connect battery earth lead.
- Top-up cooling system. See COOLING SYSTEM - ’L’ SERIES, Adjustments.
CRANKSHAFT SENSOR
Service repair no - 18.30.12
Remove
- Remove air intake pipe. See this section.
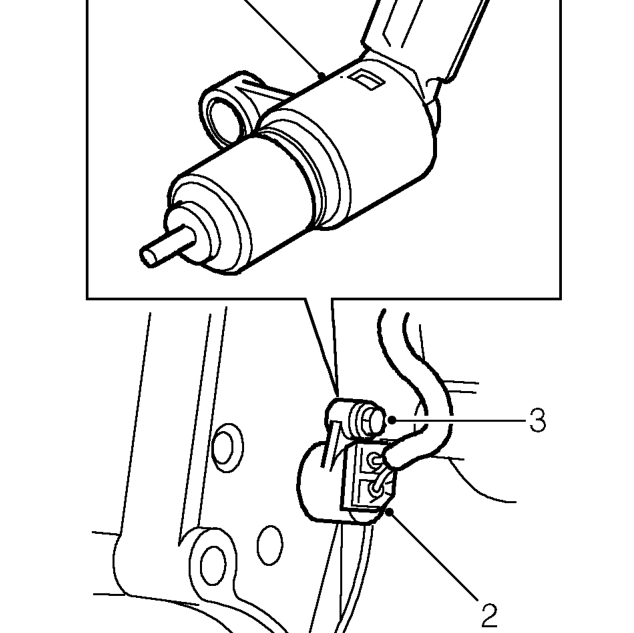
- Disconnect multiplug from crankshaft sensor.
- Remove bolt securing crankshaft sensor to gearbox adaptor plate.
- Remove crankshaft sensor.
Refit
- Clean crankshaft sensor and mating face of gearbox adaptor plate.
- Fit crankshaft sensor, fit bolt and tighten to 6 Nm.
- Connect multiplug to crankshaft sensor.
- Fit air intake pipe. See this section.
Parts & tools for this job For 1995 Rover 400
- TOOLOBD2 scannerSearch: OBD2 scanner
- TOOLDigital multimeterSearch: automotive digital multimeter
- TOOLBack-probe test leadsSearch: back probe test leads
Links open Amazon search results in a new tab. As an Amazon Associate I earn from qualifying purchases.