
Drive cable (page 4 of 4)
- Make
- Rover
- Model
- 600 Repair Manual Supplement
- Year
- 1993–1999
- Section
- Sunroof
BodyDrive cable · page 4 of 4
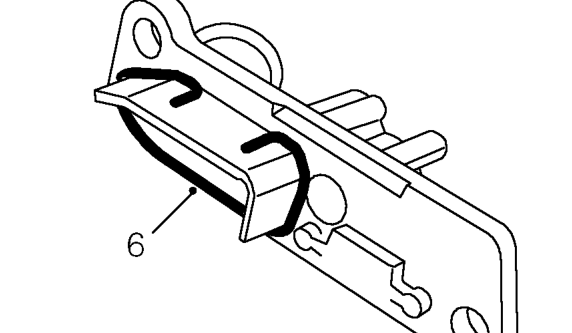
- Fit sealant to groove in end cap.
- Fit end cap and tighten screws to 4 Nm.
- Bend ends of sealant onto end cap.
- Fit motor bracket and tubes to cables. Tighten bolts securing bracket to frame to 3.5 Nm.
- Fit clips securing cable tubes to end caps.
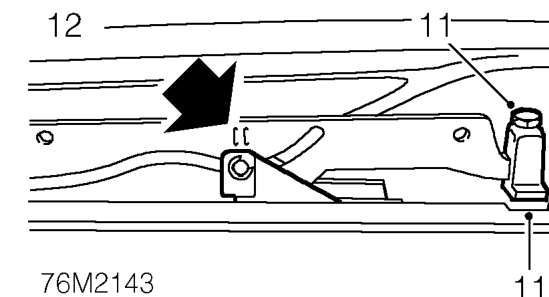
- Position culisse with its adjustable stop directly above slot in slide. Slacken stop clamp screw and position stop to rear of slot. Tighten clamp screw to 3.5 Nm.
NOTE: Stop should just contact plastic pad as it enters slide.
- Check both culisse are correctly timed.
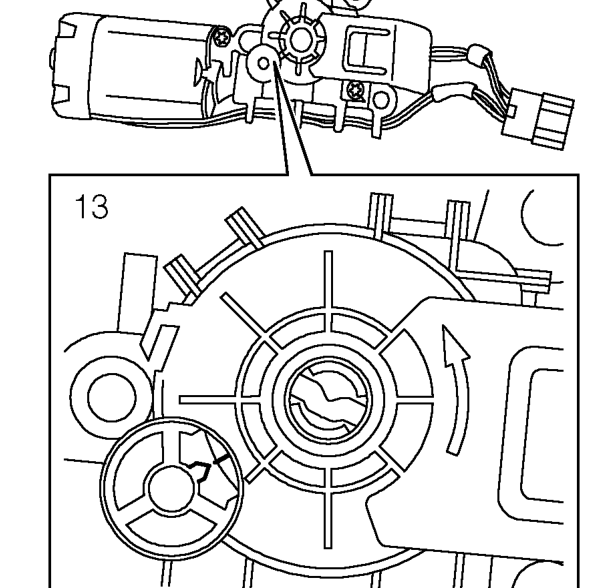
- Check motor is correctly timed.
- Adjust if necessary using a flat bladed screwdriver.
- Fit motor and tighten screws to 4 Nm.
- Fit motor multiplug to bracket.
- Fit sunshade.
- Fit drain channel and tighten screws to 2.5 Nm.
- Fit sunroof glass and fit but do not tighten screws at this stage.
- Fit sunroof assembly. See this section.
Parts & tools for this job For 1993 Rover 600
- TOOLTrim removal tool kitSearch: trim removal tool kit
- PARTTouch-up paintSearch: Rover touch up paint
- PARTPanel clip assortmentSearch: Rover panel clips assortment
Links open Amazon search results in a new tab. As an Amazon Associate I earn from qualifying purchases.