
Remove
- Make
- Rover
- Model
- Coupé, Cabriolet & Tourer 200/400 Coupé, Cabriolet & Tourer Workshop Manual
- Section
- Seats and seat belts › Remove
BodyRemove
Note: For models fitted with pretensioners, see Front seat with pretensioner.
Service Repair No. 78.10.44.99
Remove
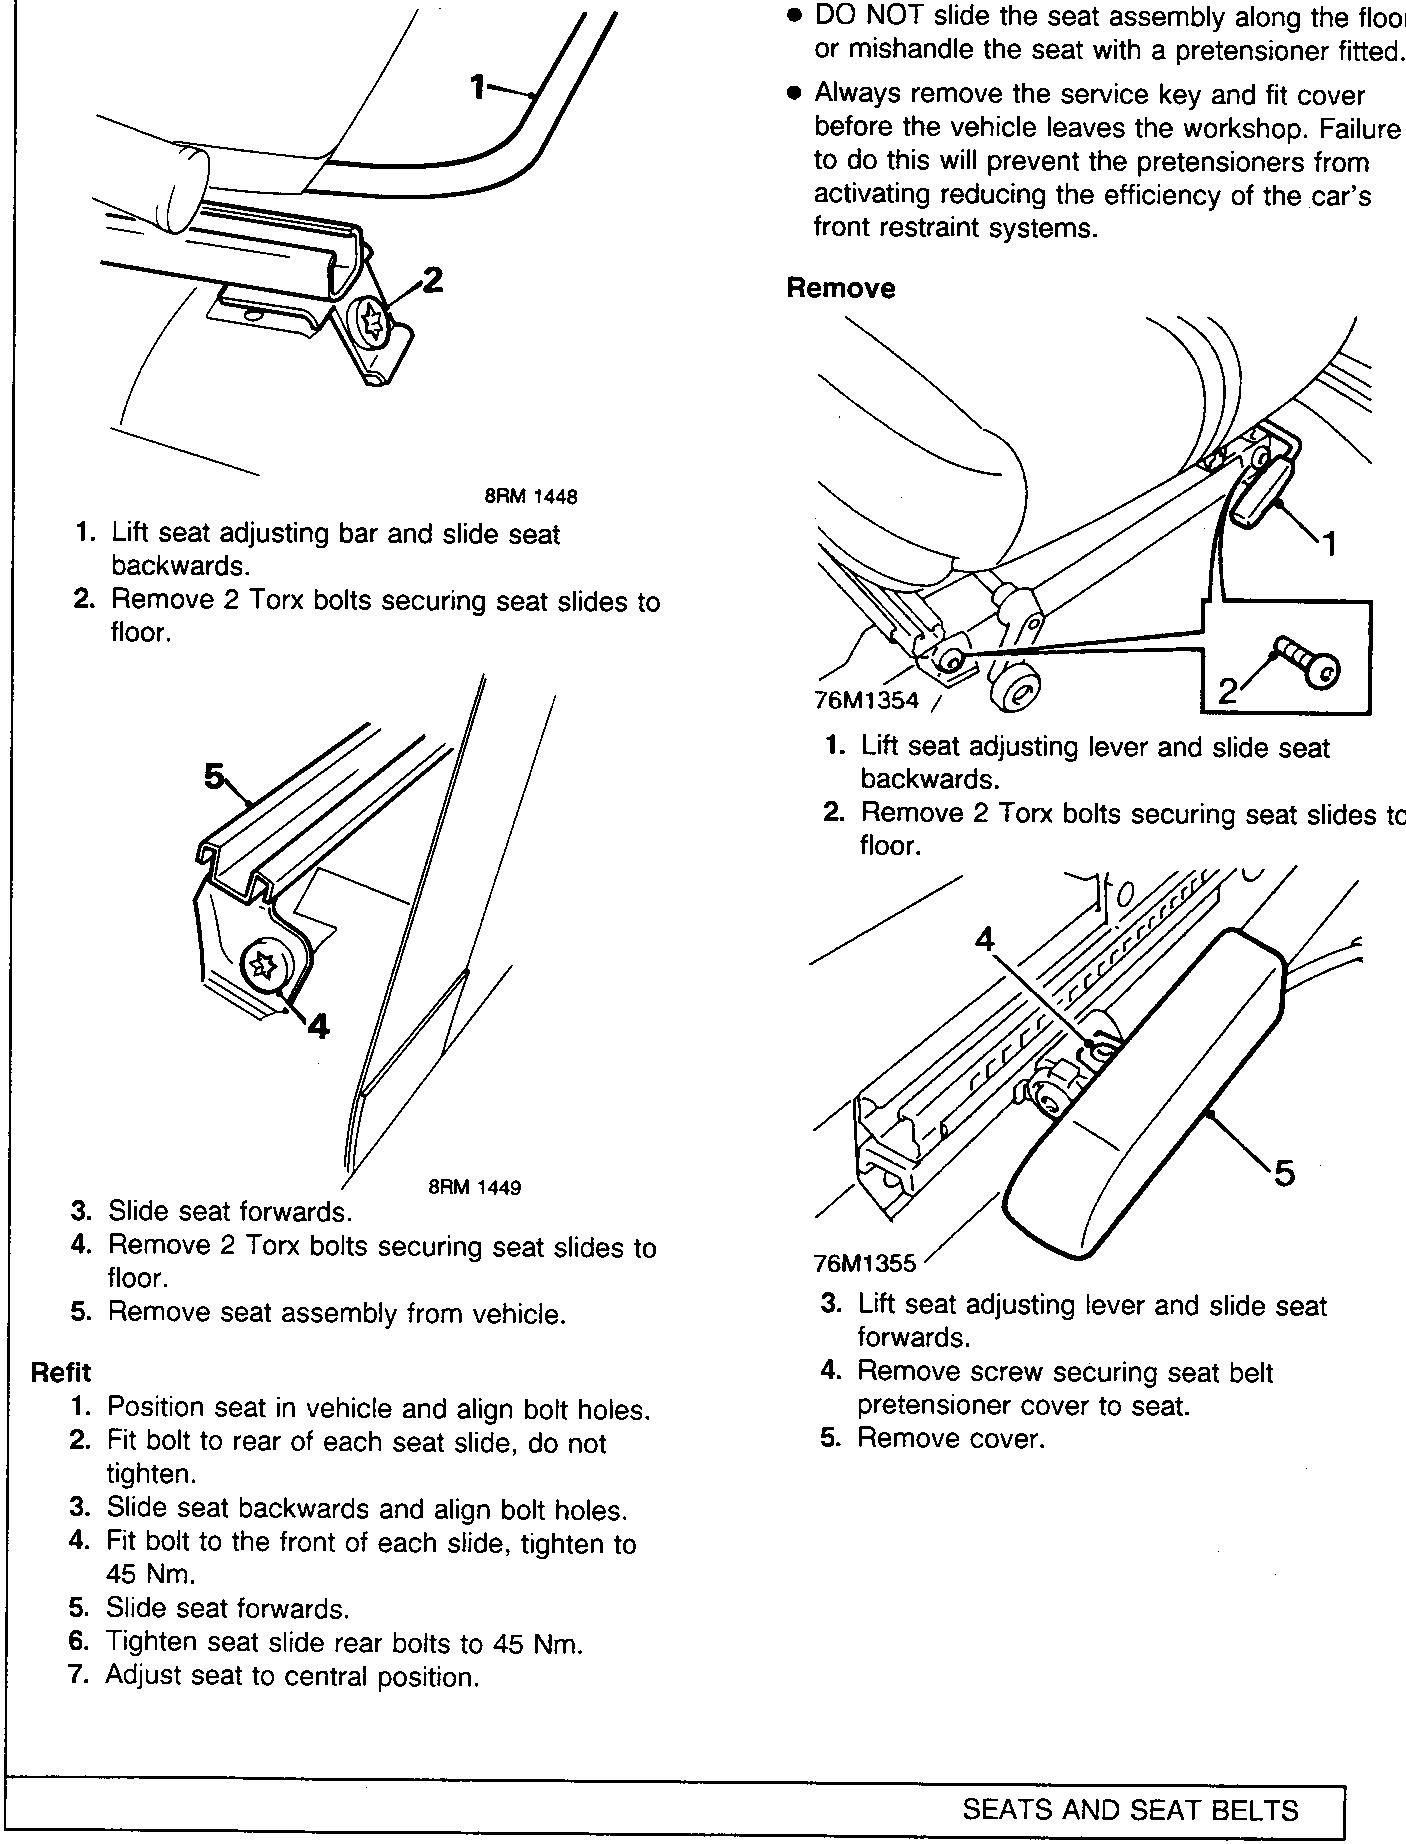
- Lift seat adjusting bar and slide seat backwards.
- Remove 2 Torx bolts securing seat slides to floor.
- Slide seat forwards.
- Remove 2 Torx bolts securing seat slides to floor.
- Remove seat assembly from vehicle.
Refit
- Position seat in vehicle and align bolt holes.
- Fit bolt to rear of each seat slide, do not tighten.
- Slide seat backwards and align bolt holes.
- Fit bolt to the front of each slide, tighten to 45 Nm.
- Slide seat forwards.
- Tighten seat slide rear bolts to 45 Nm.
- Adjust seat to central position.
FRONT SEAT WITH PRETENSIONER
Service Repair No. 78.10.44.99
CAUTION:
- ALWAYS ensure the red service key is inserted into the slot on pretensioner before removing the seat or pretensioner.
- DO NOT slide the seat assembly along the floor or mishandle the seat with a pretensioner fitted.
- Always remove the service key and fit cover before the vehicle leaves the workshop. Failure to do this will prevent the pretensioners from activating reducing the efficiency of the car's front restraint systems.
Remove
- Lift seat adjusting lever and slide seat backwards.
- Remove 2 Torx bolts securing seat slides to floor.
- Lift seat adjusting lever and slide seat forwards.
- Remove screw securing seat belt pretensioner cover to seat.
- Remove cover.
Parts & tools for this job For Rover Coupé, Cabriolet & Tourer
- TOOLOBD2 scanner with SRSSearch: OBD2 scanner ABS SRS
- TOOLTrim removal tool kitSearch: trim removal tool kit
Links open Amazon search results in a new tab. As an Amazon Associate I earn from qualifying purchases.