
Harness - injectors - diesel (page 12 of 12)
- Make
- Land Rover
- Model
- Discovery II (UK)
- Section
- Repairs
HarnessesHarness - injectors - diesel · page 12 of 12
Refit
- Connect ECM multiplugs.
- Position toe board and secure with trim fixings.
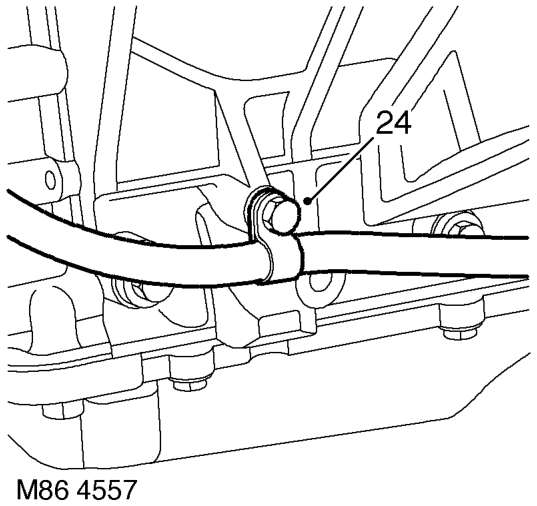
- Remove bolt securing harness clip to LH side of 12. Connect engine harness to main harness engine.
- Connect EVAP solenoid multiplug.
- Connect both fuse box multiplugs.
- Position starter lead to fuse box and secure
- Fit fuse box cover.
- Position battery positive lead to battery and
- Secure harness to coolant rail.
- Position alternator cables and tighten terminal
- Connect coolant temperature sensor multiplug.
- Connect A/C compressor multiplug.
- Secure harness clip to rear of LH cylinder head.
- Connect CKP sensor multiplug.
- Secure injector harness and connect injector
- Disconnect camshaft sensor and oil pressure switch multiplugs.
- Connect coil multiplugs.
- Remove engine harness.
- Connect and secure HS
- Fit upper inlet manifold.
- Connect battery earth lead.
- Position engine harness around engine.
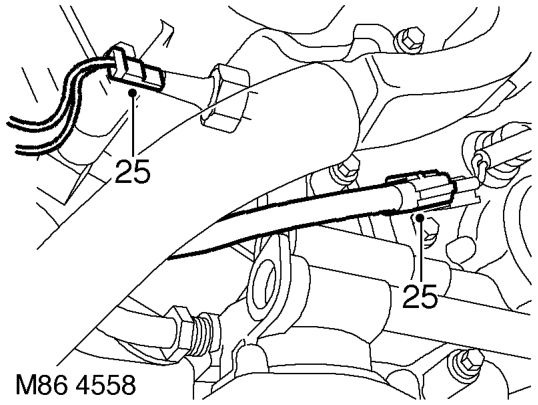
- Connect oil pressure switch and camshaft sensor multiplugs.
- Fit and tighten bolt securing harness to LH side of engine.
- Connect both knock sensor multiplugs.
- Connect battery cable and solenoid cable to starter motor.
- Position starter heat shield and secure with bolt.
- Clean exhaust flange mating faces, using a new gasket align exhaust fit nuts and tighten to 60 Nm (44 lbf.ft).
- Remove stand(s) and lower vehicle.
- Position harness into footwell and secure grommet.
multiplug and secure earth lead.
screw.
secure nut.
B+ to 18 Nm (13 lbf.ft) and terminal D+ to 5 Nm (3.7 lbf.ft)
multiplugs.
2O sensor multiplug
MANIFOLDS AND EXHAUST
- SYSTEMS - V8, REPAIRS, Gasket - inlet
- manifold - upper - Without Secondary Air
- Injection.
Parts & tools for this job For Land Rover Discovery
- PARTGlow plugsSearch: Land Rover Discovery glow plugs
- TOOLGlow plug socketSearch: glow plug socket
- TOOLDiesel compression testerSearch: diesel compression tester
Links open Amazon search results in a new tab. As an Amazon Associate I earn from qualifying purchases.