
Sensor - height - SLS Compressor unit - air - SLS
- Make
- Land Rover
- Model
- Discovery II (UK)
- Section
- Repairs › Sensor - height - SLS Compressor unit - air - SLS
Rear suspensionSensor - height - SLS Compressor unit - air - SLS · page 1 of 2
Sensor - height - SLS Compressor unit - air - SLS
$% 64.36.01 $% 64.50.10
WARNING: Ensure the air suspension system is WARNING: Ensure the air suspension system is made safe before commencing work. Otherwise made safe before commencing work. Otherwise the chassis may lower onto the bump stops the chassis may lower onto the bump stops during repair. during repair.
Remove Remove
- Raise rear of vehicle.
WARNING: Do not work on or under a vehicle supported only by a jack. Always support the vehicle on safety stands.
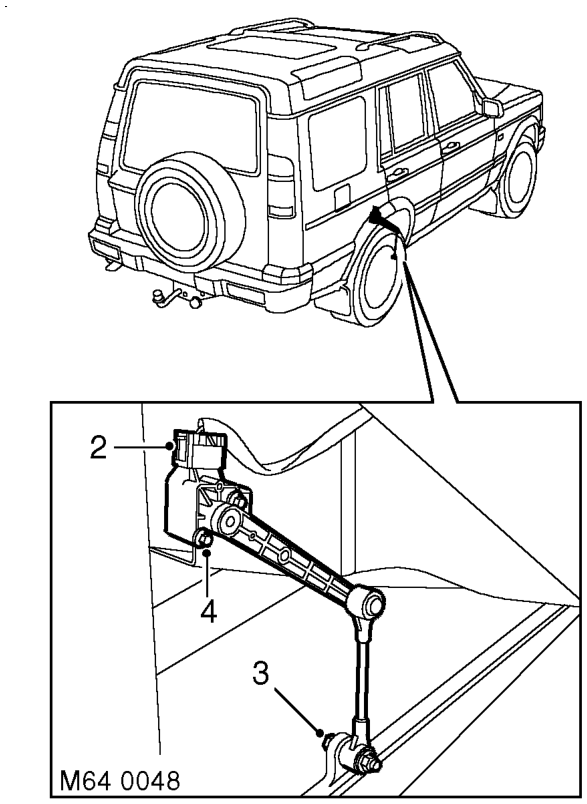
- Disconnect height sensor multiplug.
- Remove bolt securing height sensor link to radius arm.
- Remove 2 bolts securing height sensor to chassis and remove height sensor.
Refit
- Position height sensor to chassis and tighten bolts to 6 Nm (4.4 lbf.ft).
- Position height sensor link to radius arm and tighten bolt to 25 Nm (18 lbf.ft).
- Connect height sensor multiplug.
- Remove stand(s) and lower vehicle.
- Use TestBook to calibrate height sensor.
- Using TestBook, depressurise SLS air system. After depressurisation, approximately 1 bar 2
(15 lbf.in ) air pressure remains in the system.
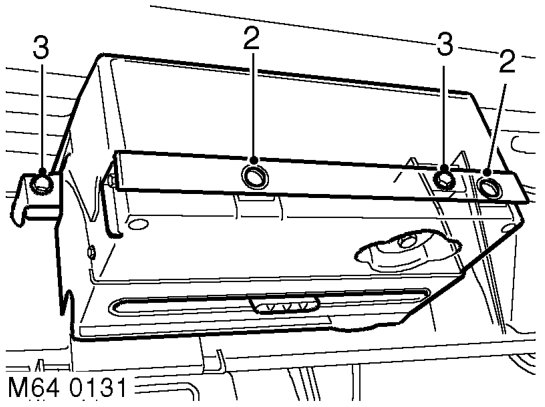
- Release 2 fasteners and remove air compressor unit cover.
- Remove 2 bolts securing air compressor unit to chassis. Release unit and lower onto blocks to support the weight.
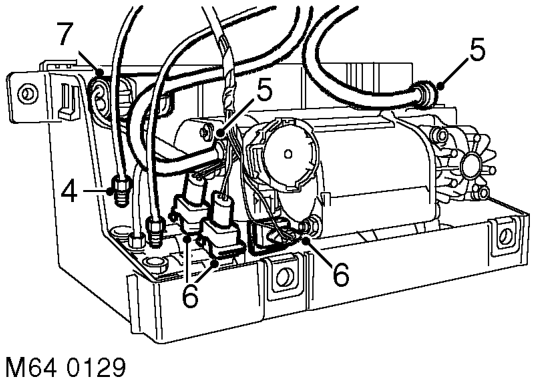
- Noting their fitted position, disconnect pipes from air valves.
CAUTION: Always fit plugs to open connections to prevent contamination.
Parts & tools for this job For Land Rover Discovery
- TOOLOBD2 scannerSearch: OBD2 scanner
- TOOLDigital multimeterSearch: automotive digital multimeter
- TOOLBack-probe test leadsSearch: back probe test leads
Links open Amazon search results in a new tab. As an Amazon Associate I earn from qualifying purchases.