
Bushes - Watts linkage
- Make
- Land Rover
- Model
- Discovery II (UK)
- Section
- Repairs › Bushes - Watts linkage
Rear suspensionBushes - Watts linkage
Bushes - Watts linkage
$% 64.35.35
Models with SLS:
WARNING: Ensure the air suspension system is made safe before commencing work. Otherwise the chassis may lower onto the bump stops during repair.
Remove
- Raise rear of vehicle.
WARNING: Do not work on or under a vehicle supported only by a jack. Always support the vehicle on safety stands.
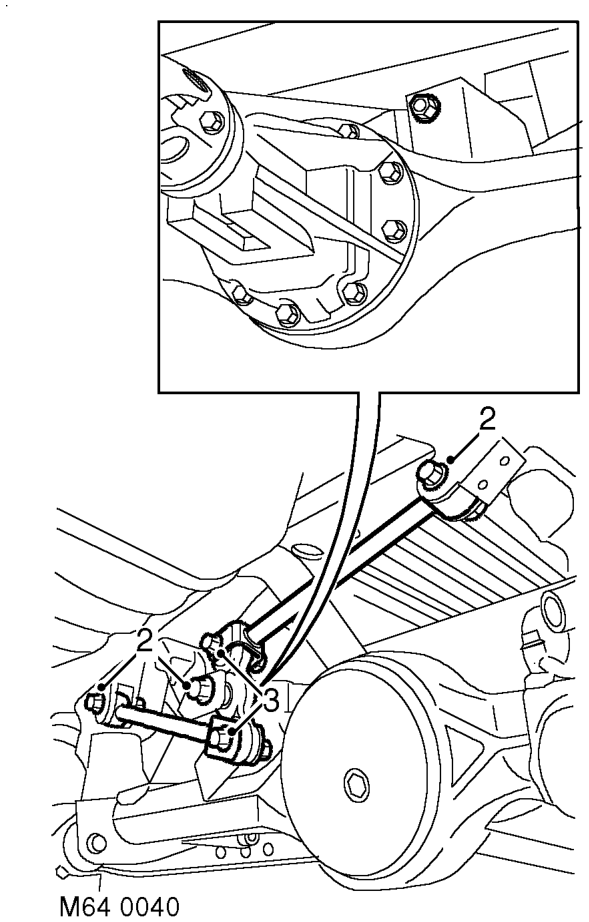
- Remove 3 nuts and bolts securing Watts linkage to axle and chassis and remove Watts linkage.
- Remove 2 nuts and bolts securing transverse links to pivot housing and remove links from pivot housing.
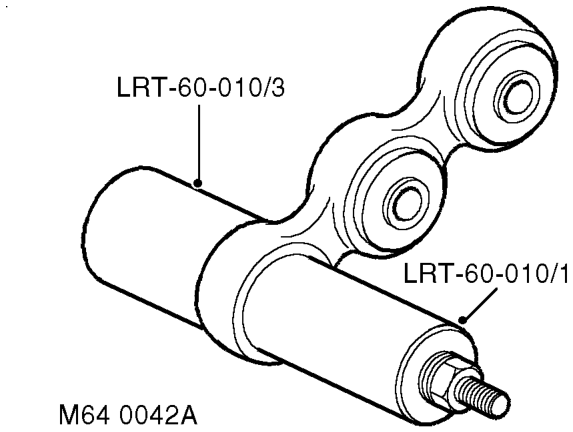
- Use LRT-60-010/1 and LRT-60-010/3 to press bushes from transverse links and pivot housing.
Refit
- Clean bush locations in transverse links and pivot housing.
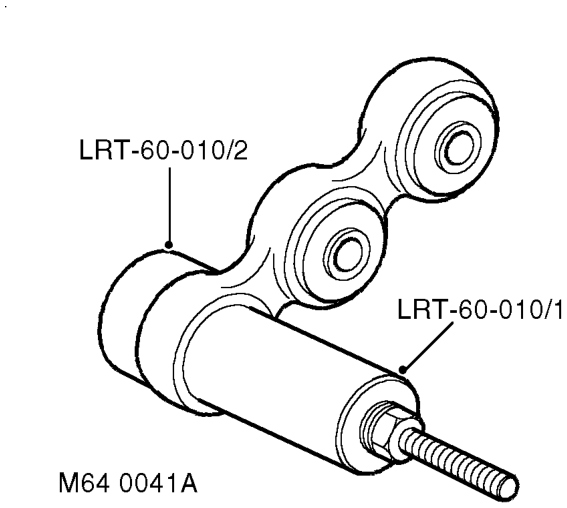
- Using LRT-60-010/1 and LRT-60-010/2press new bushes into transverse links and pivot housing.
- Position transverse links to pivot housing and tighten bolts to 155 Nm (114 lbf.ft).
- Position Watts linkage to axle and chassis. Fit bolts but do not tighten at this stage.
- Remove stand(s) and lower vehicle.
- Tighten bolts securing pivot housing to axle to 230 Nm (170 lbf.ft). Tighten bolts securing transverse links to chassis to 140 Nm (103 lbf.ft).
CAUTION: Nuts and bolts must be tightened with weight of vehicle on suspension.
Parts & tools for this job For Land Rover Discovery
- TOOLCoil spring compressorSearch: coil spring compressor
- TOOLBall joint separatorSearch: ball joint separator
- PARTRear shock absorbersSearch: Land Rover Discovery rear shock absorbers
Links open Amazon search results in a new tab. As an Amazon Associate I earn from qualifying purchases.