
Crankshaft rear oil seal - ’k’series
- Make
- Land Rover
- Model
- Freelander Workshop Manual
- Year
- 1998–2000
- Section
- Repairs › Crankshaft rear oil seal - ’k’series
Engine - K SeriesCrankshaft rear oil seal - ’k’series
- Tighten centre bolt of tool LRT-12- 133 to remove seal.
- Discard crankshaft front oil seal.
- Remove thrust button from crankshaft.
Refit
- Using a lint free cloth, throughly clean oil seal recess in oil pump and running surface on crankshaft.
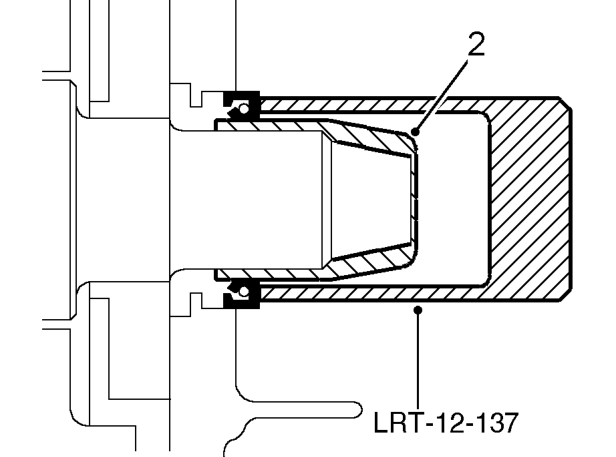
- Fit oil seal guide, from seal kit, over end of crankshaft, against the oil pump housing. Drift new seal into place using tool LRT-12-137.
CAUTION: Oil seal must be fitted dry.
- Remove tool and oil seal guide.
- Clean crankshaft gear.
- Fit crankshaft gear to crankshaft.
- Fit camshaft timing belt. See this section.
- Connect battery earth lead.
CRANKSHAFT REAR OIL SEAL - ’K’SERIES
Service repair no - 12.21.20
Remove
- Remove engine flywheel. See this section.
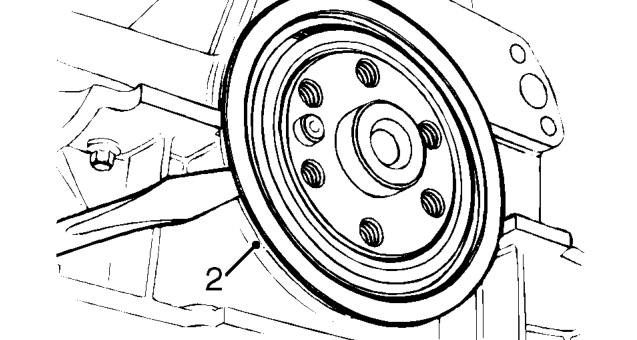
- Using a burr free flat ended screwdriver, ease crankshaft rear oil seal from cylinder block and discard seal.
CAUTION: Do not mark sealing surface on crankshaft or seal housing surfaces.
Refit
- Remove all traces of oil and sealant from cylinder block, oil seal recess and running surface on crankshaft.
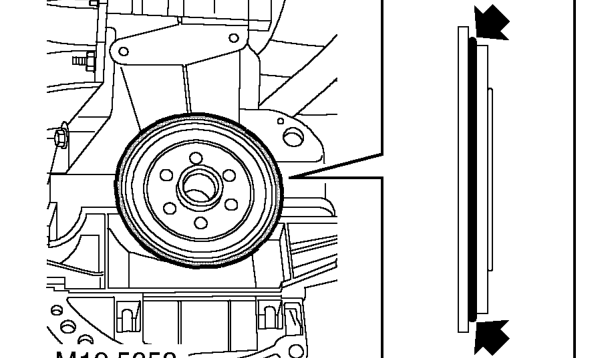
- Apply a 1.5 mm thick bead of sealant, Part No. GAC 8000 to replacement oil seal as shown.
CAUTION: Do not apply oil or grease to any part of oil seal or running surface of crankshaft. Seal must be fitted immediately after applying sealant.
Parts & tools for this job For 1998 Land Rover Freelander
- PARTEngine gasket setSearch: Land Rover Freelander 1998 engine gasket set
- TOOLTorque wrenchSearch: 3/8 inch torque wrench
- TOOLFeeler gauge setSearch: feeler gauge set
Links open Amazon search results in a new tab. As an Amazon Associate I earn from qualifying purchases.