
Remove - Engines fitted with automatic timing belt tensioner
- Make
- Land Rover
- Model
- Freelander Workshop Manual
- Year
- 1998–2000
- Section
- Repairs › Remove - Engines fitted with automatic timing belt tensioner
Engine - K SeriesRemove - Engines fitted with automatic timing belt tensioner
Remove - Engines fitted with automatic timing belt tensioner
- Disconnect battery earth lead.
- Raise front of vehicle.
WARNING: Support on safety stands.
- Remove RH road wheel.
- Remove underbelly panel. See BODY, Repairs.
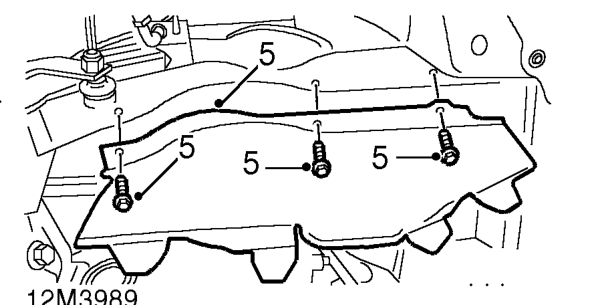
- Remove 3 bolts securing RH splash shield and remove splash shield.
- Remove timing belt upper cover. See this section.
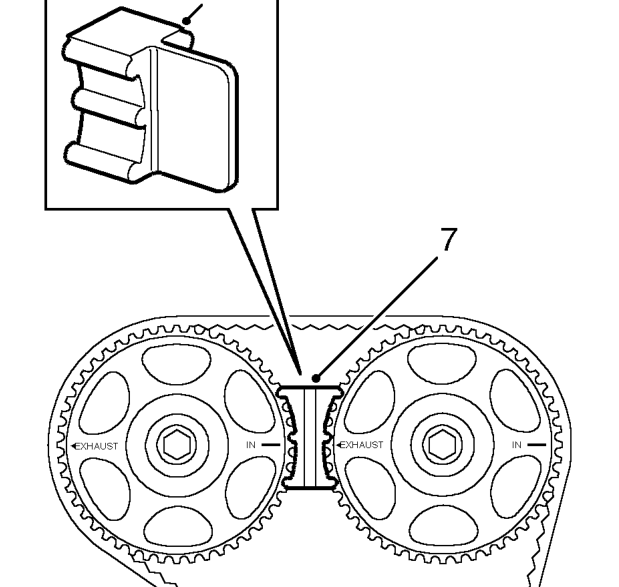
- Using a socket and extension bar on the crankshaft pulley bolt, rotate crankshaft clockwise to align camshaft gear timing marks with mark on backplate - 90° BTDC.
CAUTION: Never use camshaft gears, gear retaining bolts or timing belt to rotate crankshaft.
- Fit camshaft gear alignment tool LRT-12-134.
- Fit wooden block to jack and position jack to support engine.
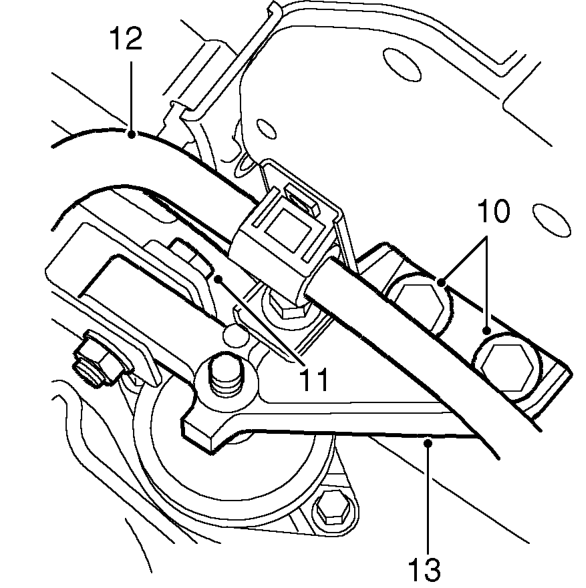
- Remove 2 bolts securing engine RH mounting bracket to engine.
- Remove through bolt and nut securing RH mounting bracket to upper tie rod.
- Release PAS cooling pipes and position aside.
- Remove engine RH mounting bracket.
Parts & tools for this job For 1998 Land Rover Freelander
- PARTTiming belt kitSearch: Land Rover Freelander 1998 timing belt kit
- TOOLEngine timing tool setSearch: Land Rover engine timing tool set
- TOOLTorque wrenchSearch: 3/8 inch torque wrench
Links open Amazon search results in a new tab. As an Amazon Associate I earn from qualifying purchases.