
Engine LH mounting - 97.5 my on (page 3 of 3)
- Make
- Rover
- Model
- 400 Workshop Manual
- Year
- 1995–2000
- Section
- Repairs
Engine - D SeriesEngine LH mounting - 97.5 my on · page 3 of 3
Refit
- Ensure pulleys are clean.
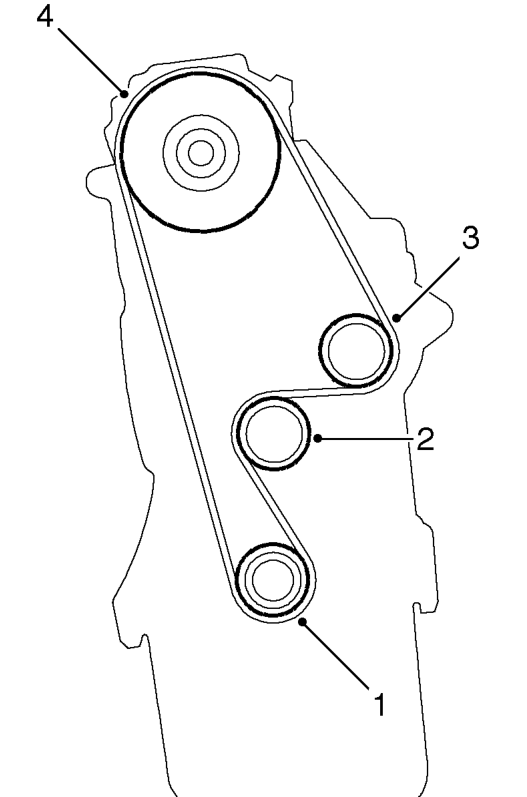
- Keeping belt as tight as possible, fit to pulleys in the following sequence:
- Crankshaft pulley
- Tensioner pulley
- Coolant pump pulley
- Camshaft pulley
CAUTION: Ensure camshaft and crankshaft timing belt pulleys do not turn.
- Loosen tensioner pulley bolt to allow tensioner to tension belt. Tighten bolt to 44 Nm.
- Clean belt guide plate and fit plate to to crankshaft.
- Clean lower cover sealing faces.
- Inspect rubber seals, replace if necessary.
NOTE: Fit rubber seals dry.
- Position cover to engine, fit bolts and tighten to 10 Nm.
- Clean dipstick tube.
- Lubricate NEW ’O’ ring with clean engine oil and fit to dipstick tube.
- Remove plug from crankcase and fit dipstick tube.
- Fit crankshaft pulley. See this section.
- Adjust camshaft timing belt tension. See Adjustments.
Parts & tools for this job For 1995 Rover 400
- PARTEngine gasket setSearch: Rover 400 1995 engine gasket set
- TOOLTorque wrenchSearch: 3/8 inch torque wrench
- TOOLFeeler gauge setSearch: feeler gauge set
Links open Amazon search results in a new tab. As an Amazon Associate I earn from qualifying purchases.