
Engine RH front mounting (page 2 of 2)
- Make
- Rover
- Model
- 400 Workshop Manual
- Year
- 1995–2000
- Section
- Repairs
Engine - D SeriesEngine RH front mounting · page 2 of 2
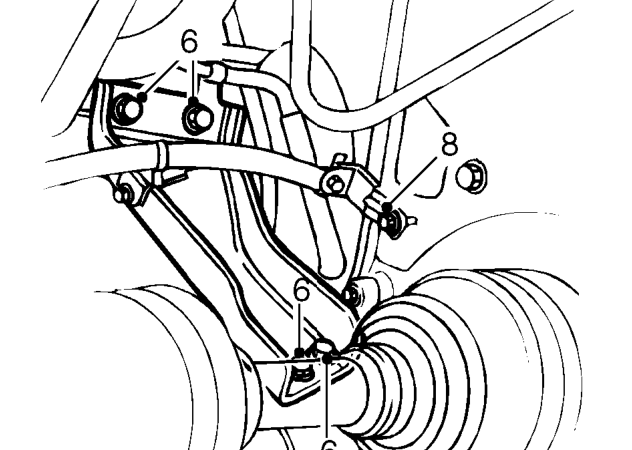
- Remove bolts securing support bracket to manifold and cylinder block.
- Move bracket aside as far as engine harness will allow.
- Remove bolt securing engine harness clip to rear mounting bracket.
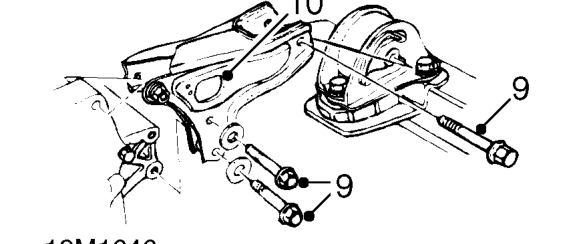
- Remove 3 remaining bolts securing rear mounting bracket.
- Move engine mounting bracket aside.
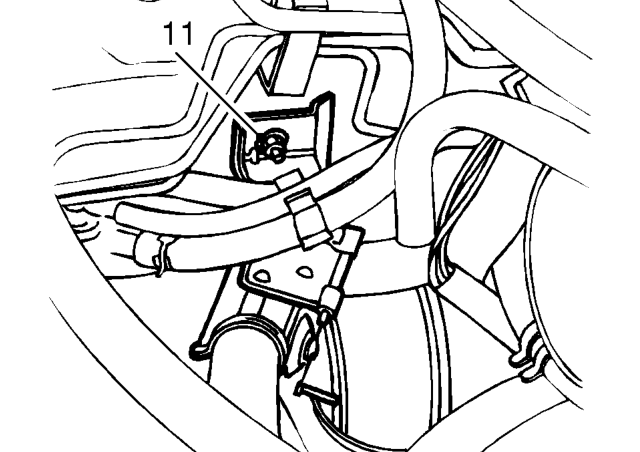
- To provide access, remove nut and release heater valve bracket from stud.
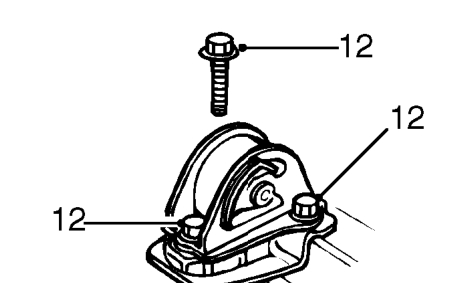
- Remove 3 bolts and remove rear engine mounting from rear beam.
Refit
- Fit rear mounting to rear beam and tighten bolts to 65 Nm.
- Fit heater valve bracket to stud and tighten nut.
- Fit rear engine mounting bracket to engine and tighten bolts to 85 Nm.
- With assistance, align bracket and fit bolt securing bracket to mounting. Tighten bolt to 60 Nm.
- Fit bolt to secure harness bracket to rear mounting bracket.
- Fit support bracket and tighten bolts at manifold and cylinder block to 24 Nm.
- Fit air intake hose to engine breather pipe and secure with clip
- Fit air intake hose to air cleaner and throttle housing. Tighten hose clip at throttle housing.
- Remove stand(s) and lower vehicle.
Parts & tools for this job For 1995 Rover 400
- PARTEngine gasket setSearch: Rover 400 1995 engine gasket set
- TOOLTorque wrenchSearch: 3/8 inch torque wrench
- TOOLFeeler gauge setSearch: feeler gauge set
Links open Amazon search results in a new tab. As an Amazon Associate I earn from qualifying purchases.