
Engine and gearbox - models with air conditioning (page 7 of 8)
- Make
- Rover
- Model
- 400 Workshop Manual
- Year
- 1995–2000
- Section
- Repairs
Engine - T SeriesEngine and gearbox - models with air conditioning · page 7 of 8
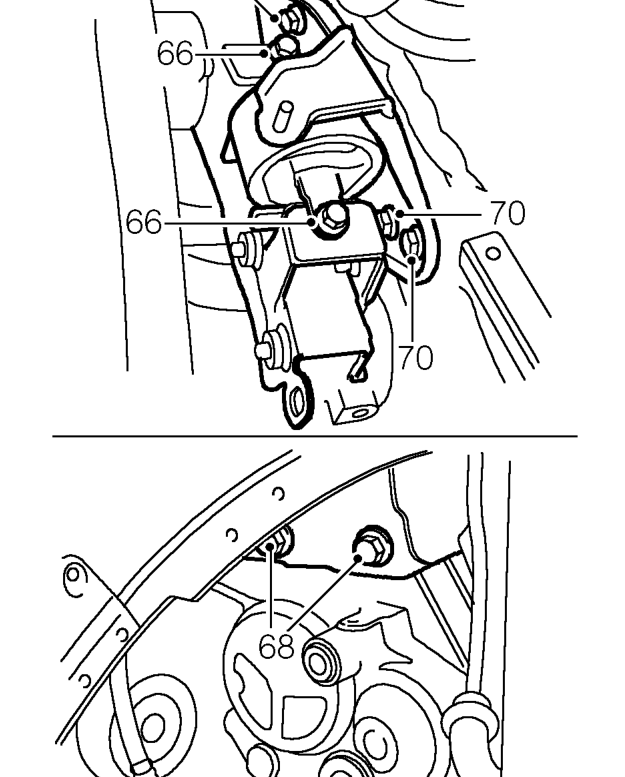
- Remove 2 bolts securing engine LH mounting to bracket.
- Lower engine on hoist.
- Remove 2 bolts securing bracket to gearbox.
- Remove bracket from gearbox.
- Remove 4 bolts securing engine LH mounting to body.
- Remove engine LH mounting.
- Using assistance, raise and remove engine and gearbox, tilt engine and manoeuvre during lifting to clear engine compartment.
Refit
- Using assistance, lower and manoeuvre engine and gearbox into position in vehicle.
- Adjust lifting bracket tool so engine is horizontal in engine compartment.
- Position engine LH mounting to body, fit bolts and tighten to 45 Nm.
- Position mounting bracket to gearbox, fit bolts and tighten to 45 Nm.
- Raise engine on hoist and align mounting to bracket.
- Fit bolts securing engine LH mounting and tighten to 45 Nm.
- Fit engine RH mounting to engine, fit bolts and tighten to 105 Nm.
- Lower engine.
- Align engine mounting to body.
- Fit engine mounting restraint bar, fit bolts and tighten to 45 Nm.
- Align tie bar to engine RH mounting, fit bolt but DO NOT tighten.
- Remove bolts securing lifting bracket to engine and remove bracket.
- Fit bolts securing h.t. lead clip plate to cylinder head and tighten to 10 Nm.
- Fit spark plug cover, fit screws and tighten to 2 Nm.
- Connect hose to PAS fluid reservoir and secure clip with clip.
- Connect expansion tank return hose to thermostat housing and secure with clip.
- Connect radiator top hose to thermostat housing and secure with clip.
- Connect bottom coolant hose to radiator and coolant rail, secure with clips.
- Secure coolant hose to clip on engine LH mounting bracket.
- Clean 2 ends of clutch hydraulic pipe.
- Connect 2 halves of clutch hydraulic pipe, ensure 2 halves of pipe are correctly engaged by trying to pull hydraulic pipes away from connector.
- Secure clutch hydraulic pipe to clip on harness.
- Remove plugs from end of air conditioning pipes.
- Clean air conditioning pipe unions.
- Lubricate 2 new ’O’ rings with refrigerant oil and fit to air conditioning pipe unions.
- Connect compressor pipe to condenser pipe and tighten union to 22 Nm.
CAUTION: To prevent damage to air conditioning pipes or components, use 2 spanners when loosening or tightening unions.
- Connect compressor pipe to evaporator pipe and tighten union to 22 Nm.
- Replace receiver/drier. See AIR CONDITIONING, Repairs.
- Remove plugs from PAS pipe unions, connect union and tighten to 37 Nm.
CAUTION: To prevent damage to PAS pipes, use 2 spanners when tightening unions.
Parts & tools for this job For 1995 Rover 400
- PARTEngine gasket setSearch: Rover 400 1995 engine gasket set
- TOOLTorque wrenchSearch: 3/8 inch torque wrench
- TOOLFeeler gauge setSearch: feeler gauge set
Links open Amazon search results in a new tab. As an Amazon Associate I earn from qualifying purchases.