
Balancer shafts
- Make
- Rover
- Model
- 600 Rover 600 Repair Manual - Volumes 1 and 2 - 2nd Edition
- Section
- Cylinder block: repairs › Balancer shafts
EngineBalancer shafts · page 1 of 2
Note:
- Use a new oil sump gasket.
- Ensure a new washer is installed on the drain plug and tighten the plug to 45Nm (do not overtighten).
- Apply liquid gasket at the points indicated.
- Install the oil sump.
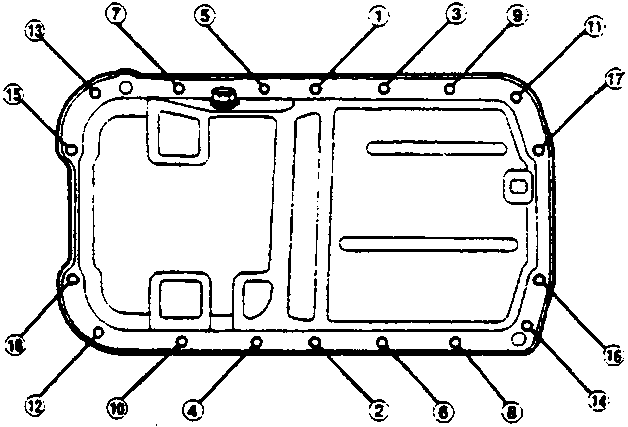
- Tighten the bolts and nuts in the sequence shown to a torque of 12Nm.
Note: Tighten the bolts and nuts in two steps and torque them in a diagonal pattern.
BALANCER SHAFTS
Inspection
Note: Inspect the balancer shaft before removing the right side cover and the balancer gear case.
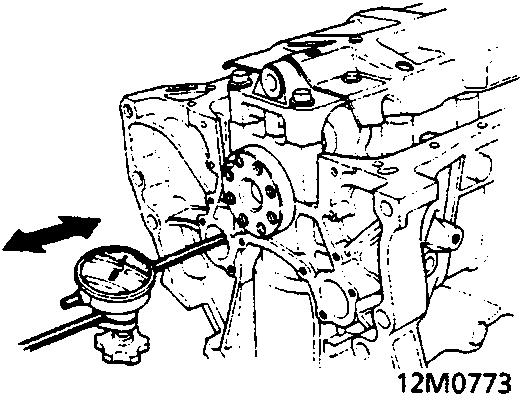
- Push the balancer shaft firmly away from the dial indicator, and zero the dial against the front end of the balancer shaft, then pull the balancer shaft firmly back toward the indicator.
Front Balancer Shaft End Play
Standard (New): 0.10 ÷ 0.35 mm
- If end play is excessive, inspect the retainer and thrust surfaces on the balancer shaft.
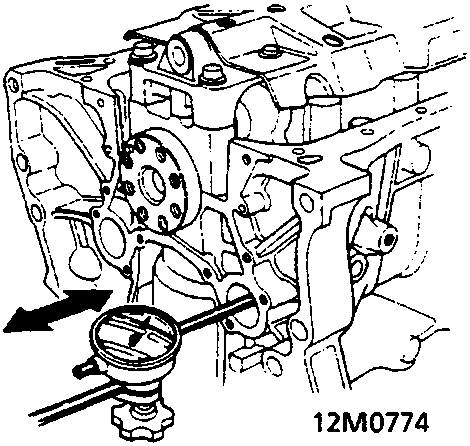
Rear Balancer Shaft End Play
Standard (New): 0.06 ÷ 0.18 mm
- If end play is excessive, inspect the thrust washer and thrust surfaces on the driven gear and oil pump housing.
Note: The thickness of the retainer (front) and thrust washer (rear) are fixed and must not be changed either by grinding or shimming.
- Remove the balancer shafts.
Note: Clean the balancer shafts.
Parts & tools for this job For Rover 600
- PARTEngine gasket setSearch: Rover 600 engine gasket set
- TOOLTorque wrenchSearch: 3/8 inch torque wrench
- TOOLFeeler gauge setSearch: feeler gauge set
Links open Amazon search results in a new tab. As an Amazon Associate I earn from qualifying purchases.