
Electronic control unit
- Make
- Rover
- Model
- 800 Workshop Manual
- Year
- 1996–1999
- Section
- Repairs › Electronic control unit
Automatic gearbox - JF403EElectronic control unit
ELECTRONIC CONTROL UNIT
Service repair no - 44.15.46
Remove
- Remove LH front seat. See BODY, Repairs.
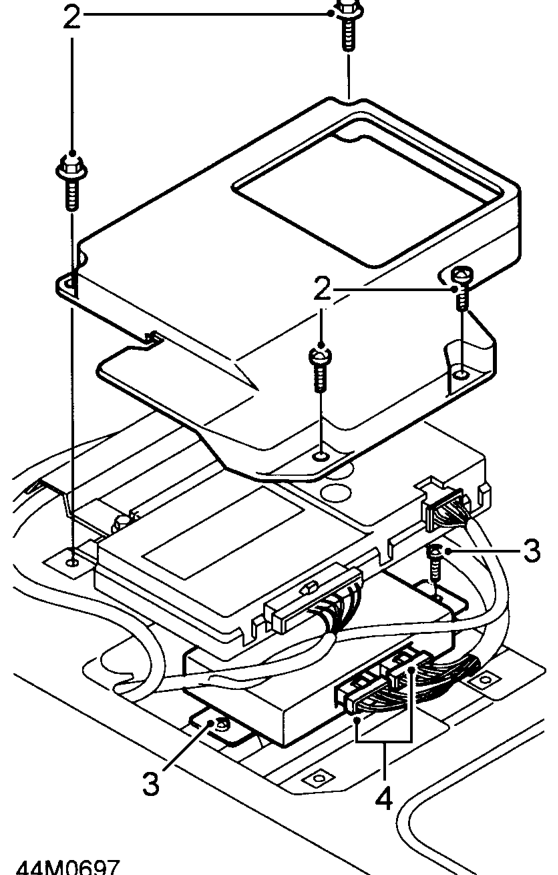
- Remove 2 screws and 2 bolts securing ECU cover. Remove cover.
- Remove 2 bolts securing gearbox ECU to floor.
- Disconnect 2 multiplugs and remove ECU.
Refit
- Position ECU and connect multiplugs.
- Fit and tighten bolts securing ECU.
- Fit ECU cover and tighten securing bolts and screws.
- Fit LH front seat. See BODY, Repairs.
VEHICLE SPEED SENSOR
Service repair no - 44.15.47
Remove
- Disconnect battery earth lead.
- Raise front of vehicle.
WARNING: Support on safety stands.
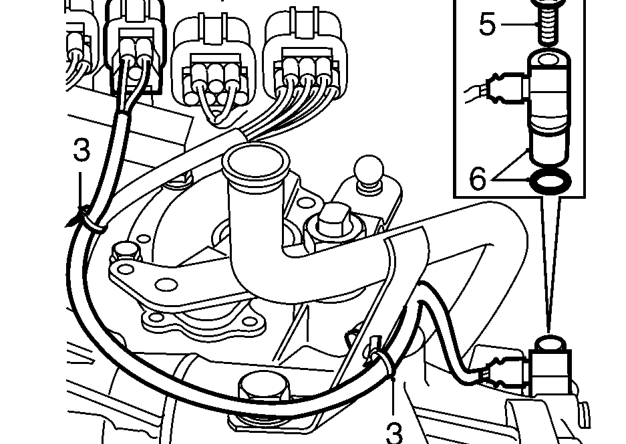
- Remove cable tie from gearbox harness leads and release harness clip from gearbox dip stick tube.
- Release and disconnect speed sensor multiplug from selector cable mounting bracket.
- Remove bolt securing speed sensor to gearbox.
- Remove speed sensor and discard ’O’ ring.
Refit
- Fit new ’O’ ring to speed sensor.
- Position sensor to gearbox and tighten bolt to 6 Nm.
- Connect and secure multiplug.
- Fit cable tie to gearbox harness and secure harness clip to dip stick tube.
- Remove stand(s) and lower vehicle.
- Connect battery earth lead.
Parts & tools for this job For 1996 Rover 800
- PARTTransmission filter kitSearch: Rover 800 1996 transmission filter kit
- FLUIDAutomatic transmission fluidSearch: Rover automatic transmission fluid
- TOOLFluid transfer pumpSearch: fluid transfer pump
Links open Amazon search results in a new tab. As an Amazon Associate I earn from qualifying purchases.