
Seal - crankshaft - rear
- Make
- Land Rover
- Model
- Freelander Workshop Manual
- Year
- 1998–2000
- Section
- Repairs › Seal - crankshaft - rear
Engine - L SeriesSeal - crankshaft - rear
SEAL - CRANKSHAFT - REAR
Service repair no - 12.21.20
Remove
- Remove flywheel. See this section.
- Remove sump. See this section.
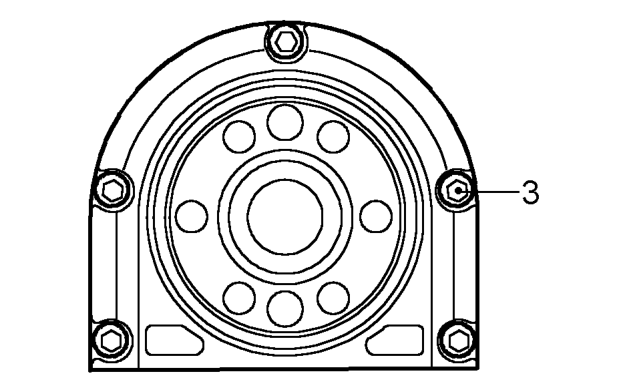
- Remove 5 bolts securing oil seal housing, remove and discard oil seal and housing.
Refit
- Ensure oil seal running surface on crankshaft and oil seal housing mating surfaces on cylinder block are clean and oil free and that bolt and dowel holes are clean and dry.
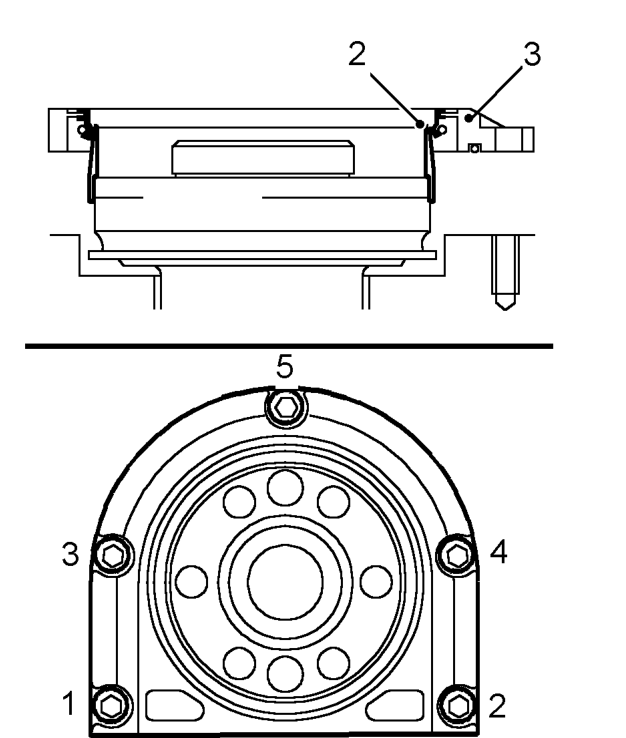
CAUTION: Do not lubricate oil seal or running surfaces on crankshaft. Do not separate protector sleeve from oil seal and do not touch lip of oil seal. If seal is inadvertently handled it must not be fitted as the coating applied to the seal during manufacture will be destroyed and oil leakage can result.
- Slide oil seal protector sleeve, oil seal and housing over end of crankshaft.
- Position oil seal and housing on cylinder block.
NOTE: Oil seal protector sleeve will be displaced as seal and housing are fitted.
- Fit bolts and working in sequence shown, tighten to 8 Nm.
- Fit sump. See this section.
- Fit flywheel. See this section.
- Fill engine with oil. See MAINTENANCE.
Parts & tools for this job For 1998 Land Rover Freelander
- PARTEngine gasket setSearch: Land Rover Freelander 1998 engine gasket set
- TOOLTorque wrenchSearch: 3/8 inch torque wrench
- TOOLFeeler gauge setSearch: feeler gauge set
Links open Amazon search results in a new tab. As an Amazon Associate I earn from qualifying purchases.