
Trailing arm bush
- Make
- Rover
- Model
- 400 Workshop Manual
- Year
- 1995–2000
- Section
- Repairs › Trailing arm bush
SuspensionTrailing arm bush
Refit
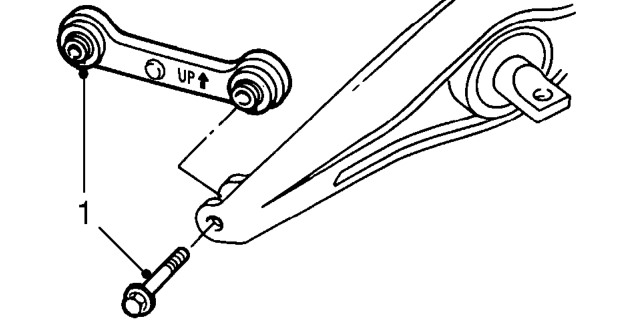
- Fit compensator arm to trailing arm with ’UP’ mark and arrow positioned as illustrated and facing front of vehicle. Fit but DO NOT tighten bolt.
- Position trailing arm assembly to body, fit bolts and tighten to 78 Nm.
- Fit bolt securing compensator arm to body but DO NOT tighten.
- Connect lower arm to trailing arm, fit but DO NOT tighten bolt.
- Align damper to lower arm, fit but DO NOT tighten bolt.
- Support lower arm on jack, connect upper arm to trailing arm, fit but DO NOT tighten bolt.
- Raise jack to take weight of vehicle, tighten all suspension mounting bolts: Lower arm bolts 47 Nm. Upper arm bolt 47 Nm. Compensator arm bolts 45 Nm.
- Remove jack.
- Fit ABS sensor and tighten bolts to 9 Nm.
- Fit sensor shield and tighten bolts to 10 Nm.
- Fit ABS harness bracket to trailing arm, tighten bolt to 10 Nm.
- Position handbrake cable through trailing arm, fit cable bracket and tighten bolt to 22 Nm.
- Fit rear hub. See this section.
- Check rear wheel alignment. See STEERING, Adjustments.
TRAILING ARM BUSH
Service repair no - 64.35.48
Remove
- Remove rear trailing arm assembly. See this section.
- Clean protective coating from trailing arm in area support tool will contact.
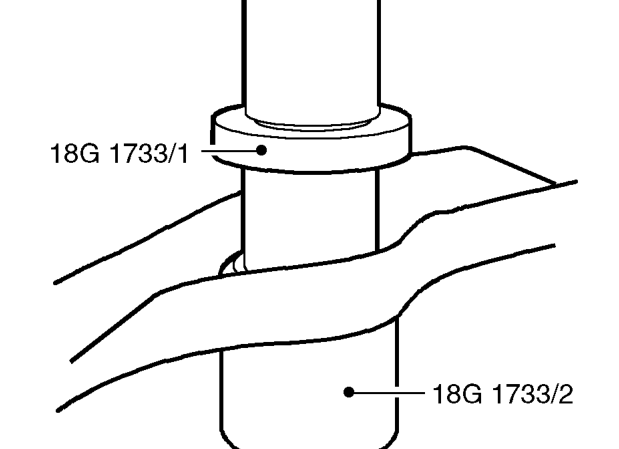
- With assistance: Position trailing arm, outer face DOWN, on support tool 18G 1733/2 .
- Position tool 18G 1733/1 on bush and press out bush.
CAUTION: Take care not to damage bore in trailing arm whilst pressing out bush.
Parts & tools for this job For 1995 Rover 400
- TOOLCoil spring compressorSearch: coil spring compressor
- TOOLBall joint separatorSearch: ball joint separator
- PARTShock absorbersSearch: Rover 400 1995 shock absorbers
Links open Amazon search results in a new tab. As an Amazon Associate I earn from qualifying purchases.