
Drive shaft - KV6 (page 2 of 2)
- Make
- Rover
- Model
- 800 Workshop Manual
- Year
- 1996–1999
- Section
- Repairs
Drive shaftsDrive shaft - KV6 · page 2 of 2
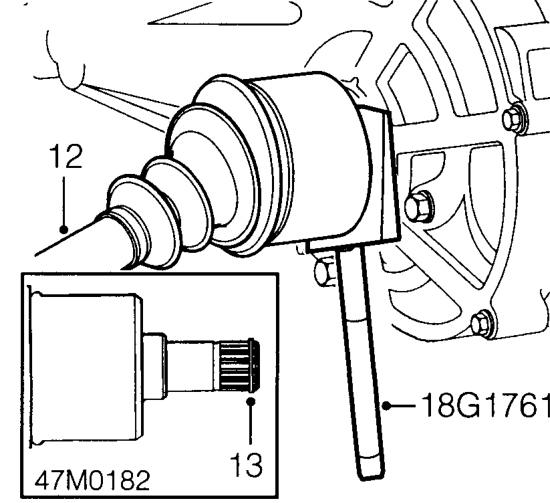
- Release drive shaft from differential using tool 18G 1761 .
- Remove drive shaft assembly.
CAUTION: Keep drive shaft horizontal to avoid damaging differential oil seal.
- Remove circlip from drive shaft and discard.
Refit
- Clean ends of drive shaft and locations in hub and differential.
- Fit new circlip to drive shaft.
- Lubricate oil seal running surfaces.
- Fit drive shaft to differential and push fully home to engage circlip. Pull joint to ensure circlip has fully engaged and shaft is retained.
- Clean ball joint taper and check to ensure ball joint boot is not damaged.
- Pull knuckle outwards, engage shaft to hub and locate ball joint to lower arm.
- Fit ball joint nut and tighten to 90 Nm.
- Fit suspension yoke over lower arm, engage yoke to damper ensuring pip on damper engages with slot in yoke. Fit bolt securing yoke to damper and tighten to 65 Nm.
- Fit bolt securing yoke to lower arm but DO NOT tighten.
NOTE: Bolt to be tightened with vehicle weight on suspension.
- Fit NEW drive shaft nut and tighten to 395 Nm.
- Stake nut to shaft.
- Remove container.
- Fit road wheel(s) and tighten nuts to correct torque. See INFORMATION, Torque wrench settings.
- Remove stand(s) and lower vehicle.
- Tighten nut and bolt securing yoke to lower arm to 90 Nm.
- Check and top up gearbox. See MANUAL GEARBOX - ’PG1’, Adjustments. See AUTOMATIC GEARBOX - ’JF403E’, Adjustments.
Parts & tools for this job For 1996 Rover 800
- PARTWheel bearingSearch: Rover 800 1996 wheel bearing
- TOOLBearing puller kitSearch: wheel bearing puller kit
- PARTCV boot kitSearch: Rover 800 1996 cv boot kit
Links open Amazon search results in a new tab. As an Amazon Associate I earn from qualifying purchases.