
Final assembly
- Make
- Rover
- Model
- Coupé, Cabriolet & Tourer 200/400 Coupé, Cabriolet & Tourer Workshop Manual
- Section
- Hood › Final assembly
BodyFinal assembly
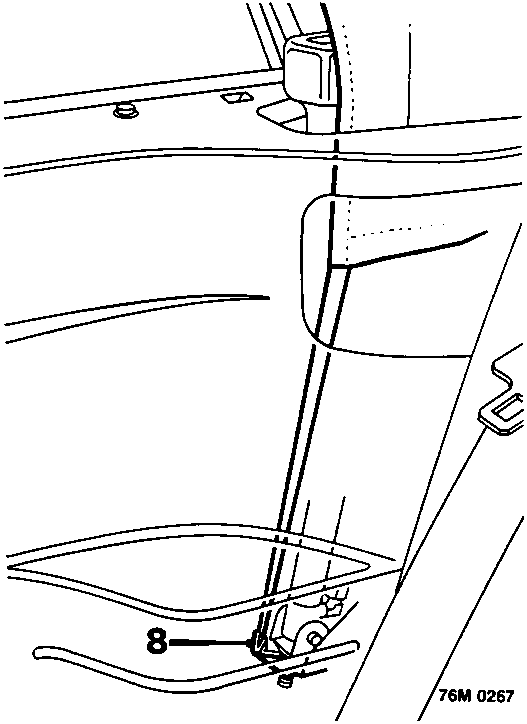
- Reach between rear quarter trim panel and hood ram to disengage elastic headlining strap from base of ram and remove wire clip from elastic strap.
- Remove retaining clip, clevis pin and Belville washer from ram trunnion.
- Lift both hood rams to their fully extended positions.
WARNING: To avoid personal injury, and serious damage to hood, do not operate rams hydraulically before hood is fully assembled.
- Check for exact alignment of clevis pin holes in ram trunnion and hood frame. If adjustment is necessary, slacken locknut and rotate trunnion until holes are exactly aligned.
- Fit Belville washer in one side of each trunnion, before fitting clevis pin and retaining clip.
- Remove support block from header rail.
Final assembly
- Lift hood and position a 50 mm wooden block between the top of each 'B' post and hood frame.
- Fit wire clips to headlining straps and engage straps in their locations at base of rams.
Note: If rear quarter trim pad is fitted, access can be gained by reaching between rear quarter trim panel and hood ram.
- Fit headlining tension rod and engage rear headlining strap over end of rod.
Note: Tension rods are 'handed' and will not lie flat on rear shelf if incorrectly fitted.
- Engage end of tension rod in its location and align fixing hole with a bradawl before fitting screw.
- Secure Velcro on headlining to rear shelf trim.
- Lower hood manually and remove support blocks from 'B' posts.
- Turn hood pump isolator valve fully clockwise.
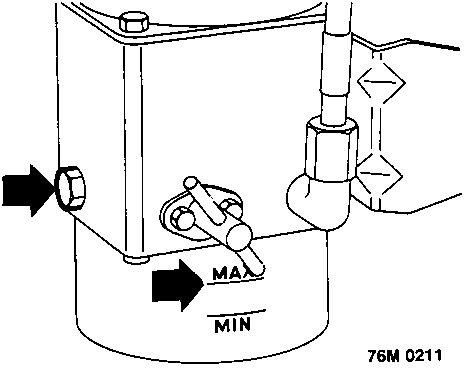
- Check oil level in reservoir. If level is low, remove L.H. side valance carpet and filler plug. Top up to 'MAX' mark using Hydraulic Oil, see INFORMATION – CAPACITIES, FLUIDS AND LUBRICANTS. and refit filler plug.
- Raise and lower hood hydraulically to check operation of hood.
Note: Pump operation may be noisy until all air is purged from ram and hoses.
- Recheck oil level reservoir.
CAUTION: A true indication of oil level is only achieved with hood in fully lowered position. Oil level must not be topped up to 'MAX' mark with hood raised.
- Fit rear quarter trim panel, see Rear quarter trim panel – Cabriolet.
- Fit rear seat cushion and squabs, see Rear seat squabs and cushion – Cabriolet/Coupe.
- Fit hood pump inspection cover and close luggage compartment lid.
- Raise and secure hood.
Parts & tools for this job For Rover Coupé, Cabriolet & Tourer
- TOOLTrim removal tool kitSearch: trim removal tool kit
- PARTTouch-up paintSearch: Rover touch up paint
- PARTPanel clip assortmentSearch: Rover panel clips assortment
Links open Amazon search results in a new tab. As an Amazon Associate I earn from qualifying purchases.