
Refit
- Make
- Rover
- Model
- Coupé, Cabriolet & Tourer 200/400 Coupé, Cabriolet & Tourer Workshop Manual
- Section
- Hood › Refit
BodyRefit
Refit
- With assistance, position hood frame and fit screws finger tight.
- With assistance, lift each hood hinge up and forward, as far as possible, before tightening screws to 22 Nm.
- Fit hood ram inspection covers to rear quarter trim panel and secure turnbuckles.
- Fit hood hinge covers and secure with screws.
- Raise hood frame onto 50mm blocks placed on top of each 'B' post.
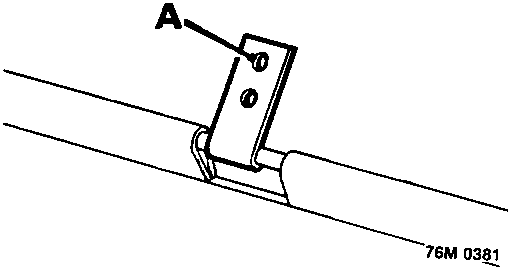
- Position rearward headlining bow to hood frame and secure with pop rivets through bracket holes 'A'.
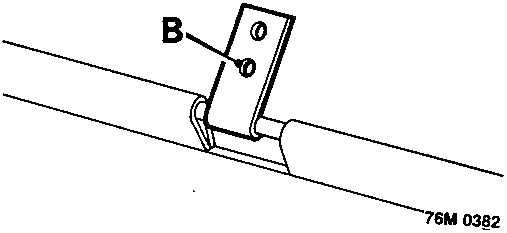
- Position forward headlining bow to hood frame and secure with pop rivets through bracket holes 'B'.
- Fit cantrail seals.
- Position outer covering, complete with all bonded – in components, to hood frame.
- Position header rail to frame locations.
- Fit cantrail seal clamps and fit header screws finger tight.
- Position header rail centrally in its slotted mountings before tightening screws.
- Position sides of hood interlayer to frame, fit washers to pop rivets and rivet interlayer to frame.
- Position cantrail tensioning cables and fit adjusting nuts only to rearmost position of cable thread.
- Apply adhesive to hood frame rear spar and mating surface of interlayer.
- Align holes in interlayer and hood frame rear spar before making adhesive bond.
- Position backlight zip to hood frame and secure with pop rivets.
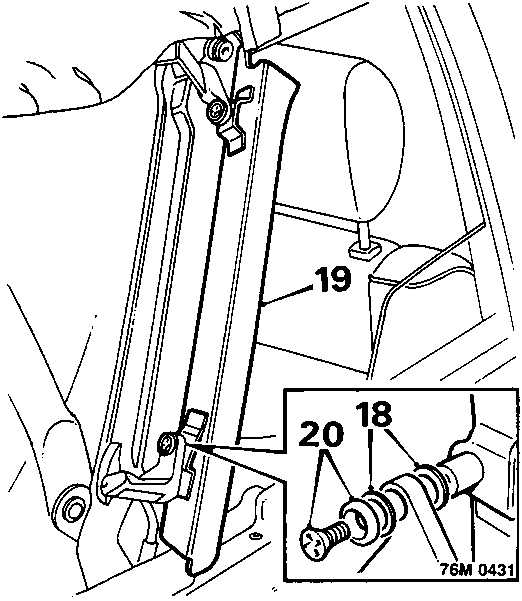
- Fit brass washers to spigots on 'D' post brackets.
- Position 'D' post brackets to hood frame.
- Fit washers and secure 'D' post brackets with screws.
- Position outer covering clamp rail to hood frame rear spar.
- Fit washers to outboard studs and secure clamp rail with nuts. Position headlining rear retainer rail to hood frame and secure with pop rivets.
- Position rear quarter brackets to body and secure with bolts.
- Fit corner finishers to hood rear quarters and use a bradawl to align screw holes before fitting finisher screws.
- Remove protective covering from backlight.
- Lift backlight into position and secure top edge with zip.
Manual hood
- Position hood strut trunnions to frame.
- Fit Belville washer to inside of each strut trunnion before fitting clevis pins and retaining clips.
All models
- Lower hood fully.
- Apply adhesive to forward edge of headlining and mating face of header rail.
- Align screw holes in headlining and header rail before making adhesive bond.
- Secure trim studs in headlining to hood handles.
- Position seal retainer to header rail and secure with screws.
- Engage header seal in retainer.
- Adjust header rail.
Power hood
- Raise hood onto 50mm wooden block placed on centre of front header.
- Lift hood rams manually to their fully extended positions.
Parts & tools for this job For Rover Coupé, Cabriolet & Tourer
- TOOLTrim removal tool kitSearch: trim removal tool kit
- PARTTouch-up paintSearch: Rover touch up paint
- PARTPanel clip assortmentSearch: Rover panel clips assortment
Links open Amazon search results in a new tab. As an Amazon Associate I earn from qualifying purchases.