
Refit
- Make
- Rover
- Model
- Coupé, Cabriolet & Tourer 200/400 Coupé, Cabriolet & Tourer Workshop Manual
- Section
- Hood › Refit
BodyRefit · page 1 of 2
rearwards as possible to achieve balance as hood is raised from vehicle.
- Disengage Velcro from rear of hood rear quarters and lift hood assembly up and rearwards from vehicle.
Refit
- With assistance, establish balanced lifting points on each side of hood and lift hood into position. Assistance from a third person will be necessary to guide loose struts through hood frame as hood is lowered into position.
- Loosely fit Torx screws to hood hinges.
- With assistance, lift each hood hinge up and forward as far as possible before tightening screws to 22 Nm.
CAUTION: Care must be taken not to damage body with hood rear quarter bracketry.
- Raise hood onto 50mm deep wooden blocks placed on top of each 'B' post.
- Fit corner finishers to hood rear quarters and align screw holes with a small bradawl before fitting finisher screws.
- Fit bolts securing hood rear quarters to inside of body.
- Lift backlight into position and secure top edge with zip fastener.
CAUTION: To avoid undue stress on zip, assistance may be necessary to hold backlight up whilst zip is fastened.
- Fit Belville washer in one side of each hood strut trunnion before fitting clevis pin and retaining clip.
- Fit wire hook to front headlining straps.
- Reach between hood strut and rear quarter trim panel and engage headlining strap hook into its bracket at base of hood strut.
- Thread elastic straps at rear of headlining through hooks in backlight lower rail.
- Fit headlining tension rods and engage elastic straps over end of each rod.
CAUTION: Tension rods are 'handed' and will not lie flat on rear shelf if fitted incorrectly.
- Engage end of each tension rod in its location and align fixing hole with a bradawl before fitting screw.
- Secure Velcro on headlining to sides of backlight and rear shelf trim.
- Remove wooden support blocks from 'B' posts.
- Adjust hood header rail, see Manual hood adjust – Cabriolet.
- Fit hood hinge covers and secure with fixing stud and screw.
- Raise and lower hood to check for correct operation.
POWER HOOD ASSEMBLY – CABRIOLET
Service Repair No. 76.61.10
Remove
- Protect top of each rear quarter panel with masking tape to prevent damage as hood is removed.
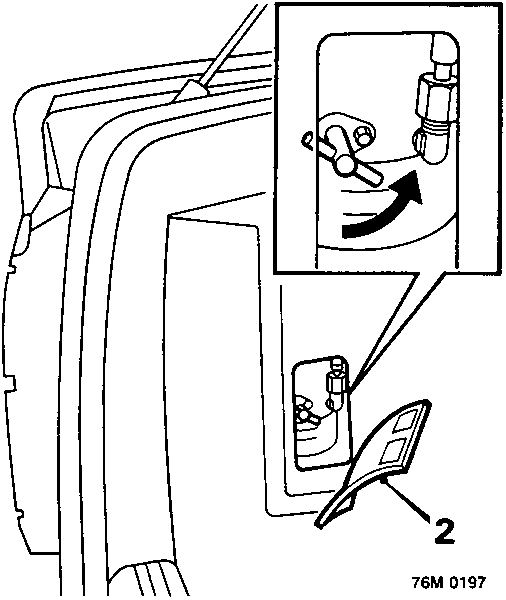
- Remove hood pump inspection cover and turn isolator valve anti – clockwise by at least four complete turns to isolate hood rams.
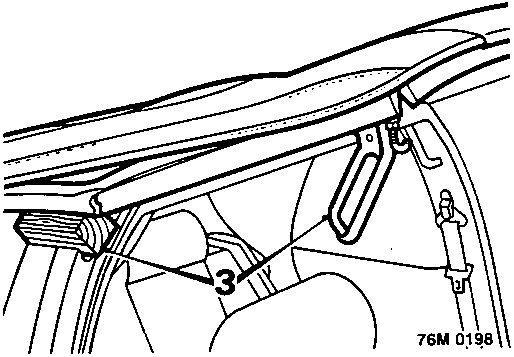
- Release hood handles, lift hood and place 50mm deep wooden blocks between top of each 'B' post and underside of hood frame.
Parts & tools for this job For Rover Coupé, Cabriolet & Tourer
- TOOLTrim removal tool kitSearch: trim removal tool kit
- PARTTouch-up paintSearch: Rover touch up paint
- PARTPanel clip assortmentSearch: Rover panel clips assortment
Links open Amazon search results in a new tab. As an Amazon Associate I earn from qualifying purchases.