
Refit
- Make
- Rover
- Model
- Coupé, Cabriolet & Tourer 200/400 Coupé, Cabriolet & Tourer Workshop Manual
- Section
- Hood › Refit
BodyRefit
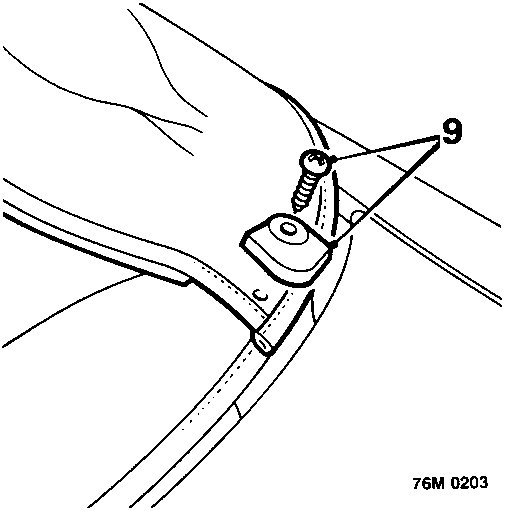
- Remove screws securing rear corners of hood to backlight and remove corner finishers.
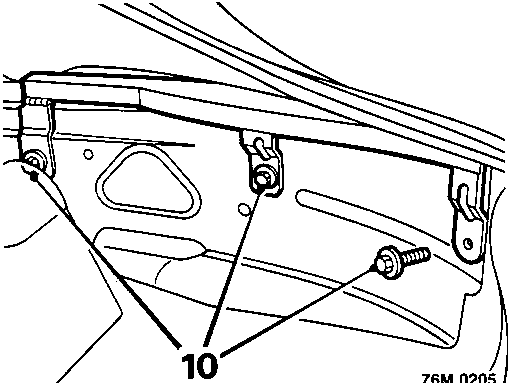
- Remove screws securing hood rear quarters to inside of body.
- Fully lower hood manually.
CAUTION: Ensure headlining does not become entangled with hood frame as hood is lowered.
- Lower both rear windows.
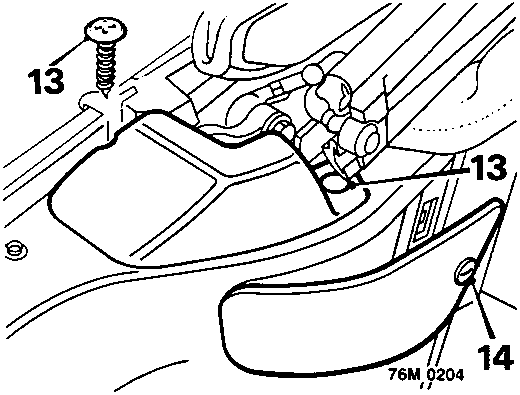
- Remove screw and trim stud from each hood hinge cover and remove hinge covers.
- Release turnbuckles on hood ram inspection covers and remove covers.
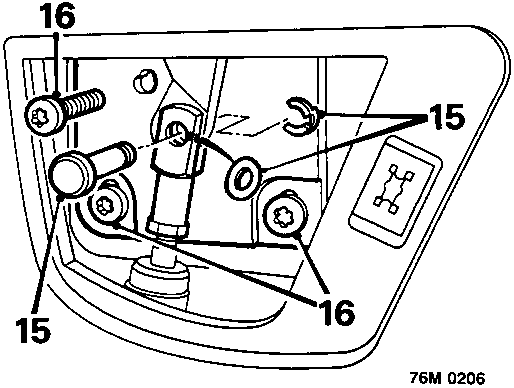
- Remove retaining clip, retain Belville washer as clevis pin is removed from ram trunnion.
- Remove Torx screws (TX40 Torx bit) from hood hinges.
- Place protective cover on luggage compartment lid to prevent damage as hood assembly is removed.
- With assistance, establish lifting points on each side of hood.
CAUTION: Lifting points should be as far rearwards as possible to achieve balance as hood is raised from vehicle.
- Disengage Velcro from rear of hood rear quarters and lift hood assembly up and rearwards from vehicle.
Refit
- With assistance, establish balanced lifting points on each side of hood and lift hood into position.
CAUTION: Care must be taken not to damage body with hood rear quarter bracketry.
- Loosely fit Torx screws to hood hinges.
- With assistance, lift each hood hinge up and forward as far as possible before tightening screws to 22 Nm.
CAUTION: Do not raise hood before brackets are tightened, or serious damage may result. If hood hinge brackets are incorrectly set, hood will foul on rear windows, again resulting in serious damage to hood.
- Raise hood manually onto 50 mm deep wooden blocks placed on top of each 'B' post.
- Fit corner finishers to hood rear quarters and align screw holes with a small bradawl, before fitting finisher screws.
- Fit bolts securing hood rear quarters to inside of body.
- Use assistance, lift backlight into position and secure top edge with zip.
CAUTION: To avoid undue stress on zip, assistance may be necessary to hold backlight up whilst zip is fastened.
- Remove support blocks from 'B' posts and place one 50mm deep block between centre of front header rail and hood.
Parts & tools for this job For Rover Coupé, Cabriolet & Tourer
- TOOLTrim removal tool kitSearch: trim removal tool kit
- PARTTouch-up paintSearch: Rover touch up paint
- PARTPanel clip assortmentSearch: Rover panel clips assortment
Links open Amazon search results in a new tab. As an Amazon Associate I earn from qualifying purchases.