
Refit
- Make
- Rover
- Model
- Coupé, Cabriolet & Tourer 200/400 Coupé, Cabriolet & Tourer Workshop Manual
- Section
- Hood › Refit
BodyRefit · page 1 of 6
Refit
- Attach threaded end of new cable to a suitable length of 3mm hard plastic vacuum hose.
- Feed vacuum hose through forward opening of outer covering and draw cable into position.
- Disconnect hose from cable.
- Attach cable loop over location tag in header rail and bend tag over to retain cable.
- Apply adhesive to outer covering and header rail.
- Bond outer covering to header rail, ensuring that beading at side of header is correctly positioned.
- Fit forward end of cantrail seal to retainer.
- Fit seal clamp and screw, but do not tighten screw at this stage.
- Engage tensioning cable in hood frame location.
- Fit adjustment nut to rearmost position of cable thread.
- Adjust cantrail cable tension, see Adjustments.
- Raise and secure hood. Close rear windows.
- Adjust position of cantrail seal to give good fit at header and tighten seal clamp.
HOOD OUTER COVERING – CABRIOLET
Service Repair No. 76.61.11
The following operation involves the bonding of fabric backed vinyl to various steel components of the hood frame. If adhesive is to be applied to the fabric backing, Dunlop 758 adhesive or equivalent should be used. For direct application on vinyl surfaces, use Dunlop S1588 adhesive or equivalent.
A thin coating of adhesive should be applied to both surfaces and then allowed to cure, until just touch dry, for between 5 and 10 minutes, before the bond is made.
Remove
- Lower hood.
- Lower rear windows.
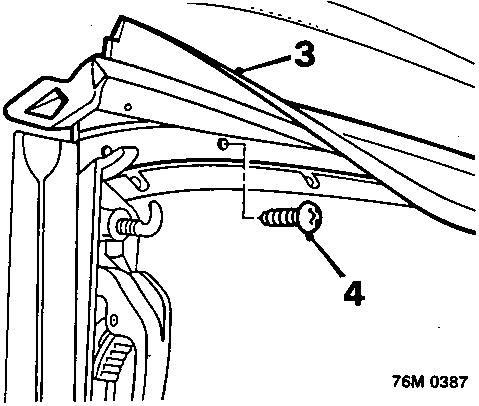
- Release header seal from rear retainer.
- Remove 9 screws securing front header seal retainer and remove header seal.
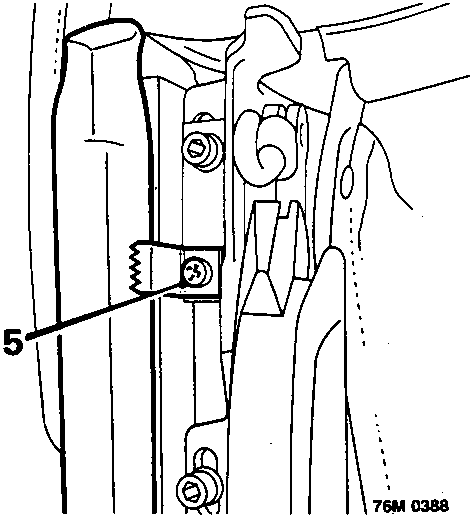
- Slacken screws securing cantrail seal clamps.
Parts & tools for this job For Rover Coupé, Cabriolet & Tourer
- TOOLTrim removal tool kitSearch: trim removal tool kit
- PARTTouch-up paintSearch: Rover touch up paint
- PARTPanel clip assortmentSearch: Rover panel clips assortment
Links open Amazon search results in a new tab. As an Amazon Associate I earn from qualifying purchases.