
Inspection (page 2 of 2)
- Make
- Land Rover
- Model
- Discovery II (UK)
- Section
- Overhaul
Engine - Td5Inspection · page 2 of 2
- Apply Loctite 242 to threads of oil pump drive sprocket bolt, fit bolt and tighten to 25 Nm (18 lbf.ft).
- Fit timing chain fixed guide, fit bolts and tighten to: l M6 bolt – 10 Nm (7 lbf.ft) l M10 bolt – 45 Nm (34 lbf.ft)
- Fit timing chain adjustable guide, fit bolt and tighten to 25 Nm (18 lbf.ft).
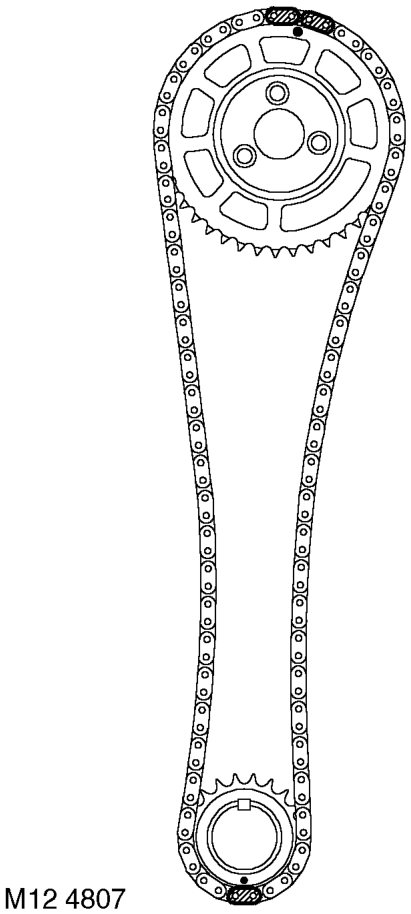
- Fit camshaft sprocket to timing chain with timing mark on sprocket between the 2 coloured links, suitably retain sprocket on chain.
- Fit timing chain to crankshaft sprocket aligning coloured link to timing mark on sprocket.
- Ensure timing marks are positioned as shown - No.1 piston at TDC firing.
- Apply an even film of sealant Part No. STC 4600 to mating face of timing cover and spread to an even film using a roller.
CAUTION: Assembly and bolt tightening must be completed within 20 minutes of applying sealant.
- Fit timing cover, fit bolts in their original fitted positions and working from the centre outwards, tighten progressively to 27 Nm (20 lbf.ft).
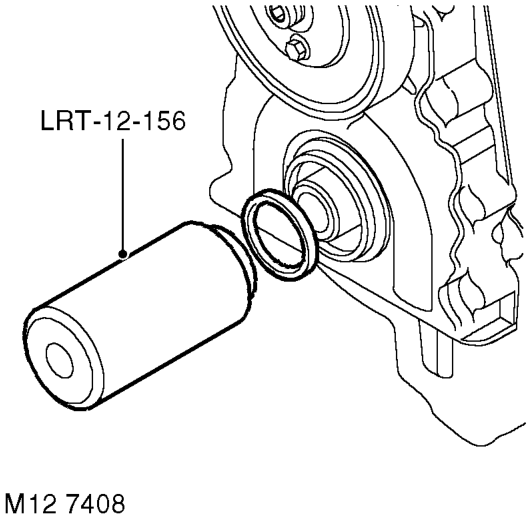
- Fit oil seal guide, from seal kit over end of crankshaft.
- Fit new oil seal into timing cover using tool LRT-12-156.
CAUTION: Oil seal must be fitted dry.
- Remove tool LRT-12-156 and oil seal guide.
- Fit crankshaft pulley, fit and lightly tighten crankshaft pulley bolt.
Parts & tools for this job For Land Rover Discovery
- PARTEngine gasket setSearch: Land Rover Discovery engine gasket set
- TOOLTorque wrenchSearch: 3/8 inch torque wrench
- TOOLFeeler gauge setSearch: feeler gauge set
Links open Amazon search results in a new tab. As an Amazon Associate I earn from qualifying purchases.