
Actuator - rear - ACE (page 2 of 2)
- Make
- Land Rover
- Model
- Discovery II (UK)
- Section
- Repairs
Rear suspensionActuator - rear - ACE · page 2 of 2
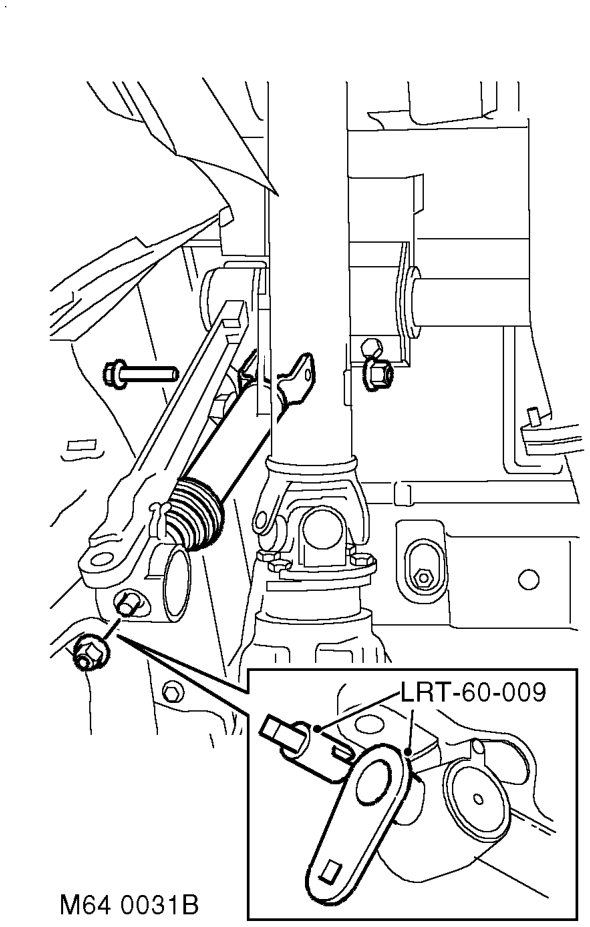
- Use LRT-60-009 to remove nut securing actuator push rod to long arm.
- Remove nut and bolt securing actuator to short arm and remove actuator.
CAUTION: The short arm and torsion bar are supplied as an assembly and must not be separated.
Refit
- Position actuator and tighten nut and bolt securing actuator to short arm to 180 Nm (133 lbf.ft).
- Using LRT-60-009 , fit and tighten nut securing actuator push rod to long arm to 48 Nm (35 lbf.ft).
- Connect pipes to actuator with cap nuts and new sealing washers. Tighten cap nuts to 29 Nm (21 lbf.ft). Ensure pipes are not under tension or kinked.
- Connect anti-roll bar link to long arm and tighten nut to 50 Nm (37 lbf.ft).
- Ensure washer is in place on lower ball joint of each anti-roll bar link and connect lower ball joints to axle. Tighten nuts to 100 Nm (74 lbf.ft).
- Renew ACE high pressure filter. FRONT SUSPENSION, REPAIRS, Filter - high pressure - ACE.
- Lower vehicle.
- Bleed ACE hydraulic system. FRONT SUSPENSION, ADJUSTMENTS, ACE hydraulic system bleeding.
Parts & tools for this job For Land Rover Discovery
- TOOLCoil spring compressorSearch: coil spring compressor
- TOOLBall joint separatorSearch: ball joint separator
- PARTRear shock absorbersSearch: Land Rover Discovery rear shock absorbers
Links open Amazon search results in a new tab. As an Amazon Associate I earn from qualifying purchases.