
Models with air conditioning (page 2 of 3)
- Make
- Land Rover
- Model
- Freelander Workshop Manual
- Year
- 1998–2000
- Section
- Repairs
Engine - L SeriesModels with air conditioning · page 2 of 3
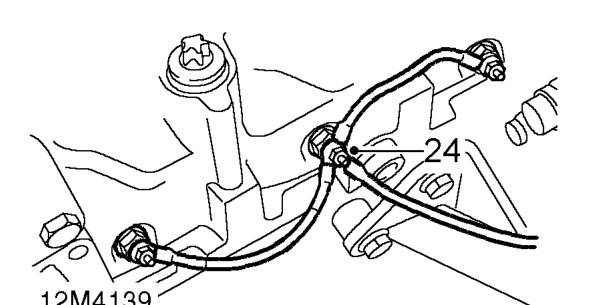
- Remove nut and disconnect feed lead from glow plug.
NOTE: 4 glow plugs fitted to later engines.
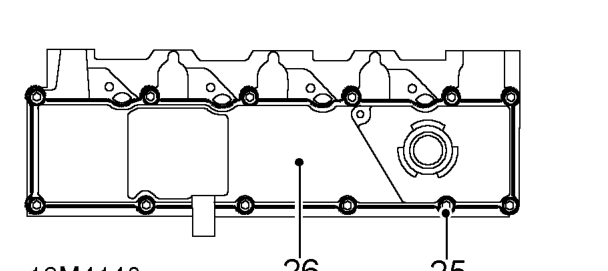
- Remove 12 bolts securing camshaft cover.
- Remove camshaft cover and gasket.
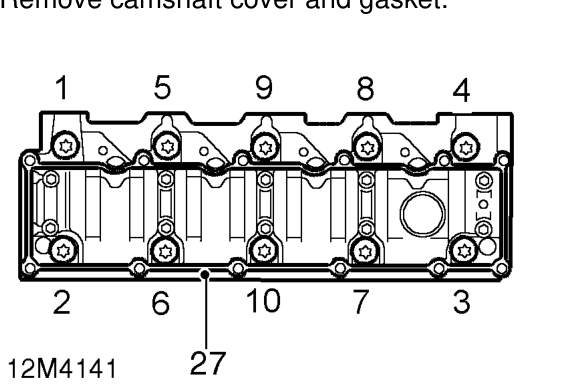
- Working in the sequence shown, progressively loosen and remove 10 cylinder head bolts.
NOTE: Store cylinder head bolts in their original positions for refitment.
- Remove cylinder head assembly and place on wooden blocks or stands.
CAUTION: The tips of the injectors and glow plugs protrude below the face of the cylinder head and could be damaged if the cylinder head is placed face down on a work bench.
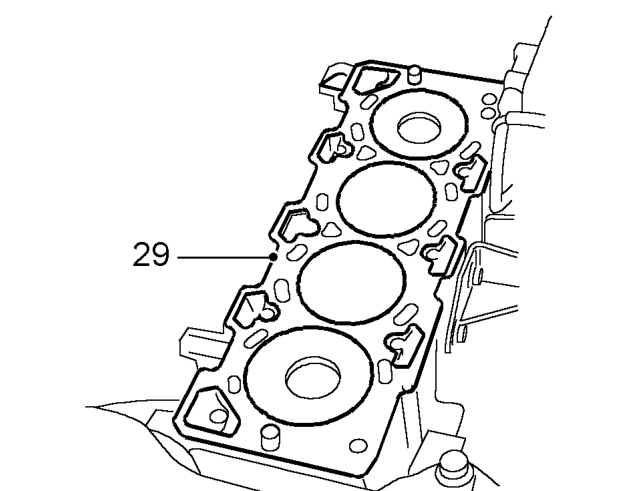
- Remove cylinder head gasket.
CAUTION: Note the gasket thickness indicator and ensure the same thickness gasket is used on refitment of cylinder head.
Parts & tools for this job For 1998 Land Rover Freelander
- TOOLA/C manifold gauge setSearch: AC manifold gauge set
- TOOLUV leak detection kitSearch: AC UV leak detection kit
- PARTCabin filterSearch: Land Rover Freelander 1998 cabin filter
Links open Amazon search results in a new tab. As an Amazon Associate I earn from qualifying purchases.