
Servo - air temperature control Plenum Air Intake
- Make
- Land Rover
- Model
- Discovery II (UK)
- Section
- Repairs › Servo - air temperature control Plenum Air Intake
Heating and ventilationServo - air temperature control Plenum Air Intake
Servo - air temperature control Plenum Air Intake
$% 80.10.42 $% 80.15.62
Remove Remove
- Disconnect battery earth lead.
- Driver side: Remove heater assembly. HEATING AND VENTILATION, REPAIRS, Heater assembly - models with air conditioning.
- Passenger side: Remove blower assembly. HEATING AND VENTILATION, REPAIRS, Blower assembly.
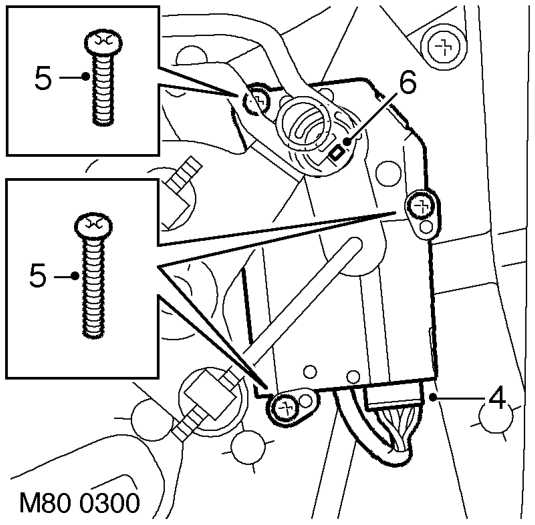
- Disconnect multiplug from servo.
- Remove 3 screws securing servo to casing and release servo.
- Release clip securing operating lever, release the lever and remove servo. lever.
Refit
- Connect operating lever to servo and secure with clip.
- Position servo to casing, engage locating pegs and secure with screws.
- Connect multiplug to servo.
- Driver side: Fit heater assembly. HEATING AND VENTILATION, REPAIRS, Heater assembly - models with air conditioning.
- Passenger side: Fit blower assembly. HEATING AND VENTILATION, REPAIRS, Blower assembly.
- Connect battery earth lead.
- Remove both windscreen side finishers. EXTERIOR FITTINGS, REPAIRS, Side finisher - windscreen.
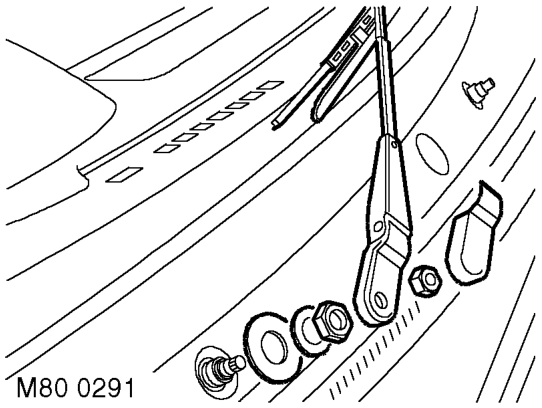
- Remove caps from windscreen wiper arms.
- Remove nuts securing wiper arms to wiper linkage.
- Remove both wiper arms.
- Remove lock nuts from wiper linkage and collect washer and rubber spacers.
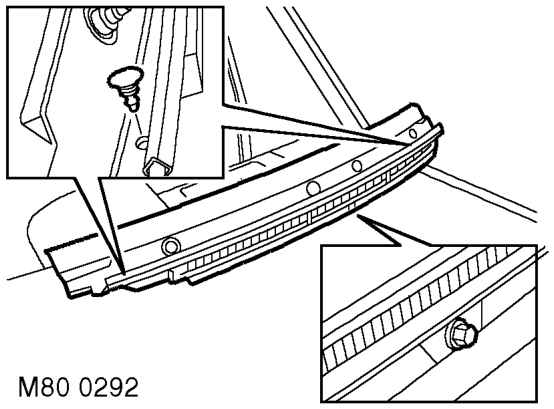
6. Remove 2 trim clips and centre bolt securing plenum air intake to body.
- Remove plenum air intake.
Parts & tools for this job For Land Rover Discovery
- TOOLA/C manifold gauge setSearch: AC manifold gauge set
- TOOLUV leak detection kitSearch: AC UV leak detection kit
- PARTCabin filterSearch: Land Rover Discovery cabin filter
Links open Amazon search results in a new tab. As an Amazon Associate I earn from qualifying purchases.