
Blower assembly
- Make
- Land Rover
- Model
- Discovery II (UK)
- Section
- Repairs › Blower assembly
Heating and ventilationBlower assembly
- Disconnect both evaporator drain hoses.
- Remove front heater ducting.
- Remove 4 nuts and bolt securing heater assembly, release heater assembly from bulkhead grommet and remove from vehicle.
Refit
- Position heater assembly to bulkhead, locate heater in bulkhead grommet.
- Fit nuts and bolt securing heater and tighten to 16 Nm (12 lbf.ft).
- Position RH fascia support bracket, fit and tighten nuts.
- Fit front heater ducting.
- Position centre console support bracket, fit and tighten screws.
- Connect evaporator drain hoses.
- Position heater motor to heater casing, fit nuts and bolt and tighten to 19 Nm (14 lbf.ft).
- Connect multiplug heater motor.
- Position rear heater ducting and secure with screws.
- Fit fascia. INTERIOR TRIM COMPONENTS, REPAIRS, Fascia.
- Using new 'O' rings, position air conditioning pipes to evaporator fit bolts and tighten to 5 Nm (3.7 lbf.ft).
- Position heater hoses and secure hose clips.
- Recharge air conditioning system. AIR CONDITIONING, REFRIGERANT RECOVERY, RECYCLING AND RECHARGING, Refrigerant recovery, recycling and recharging.
- Refill cooling system. l COOLING SYSTEM - V8, ADJUSTMENTS, Drain and refill. l COOLING SYSTEM - Td5, ADJUSTMENTS, Drain and refill.
Blower assembly
$% 80.20.12
Remove
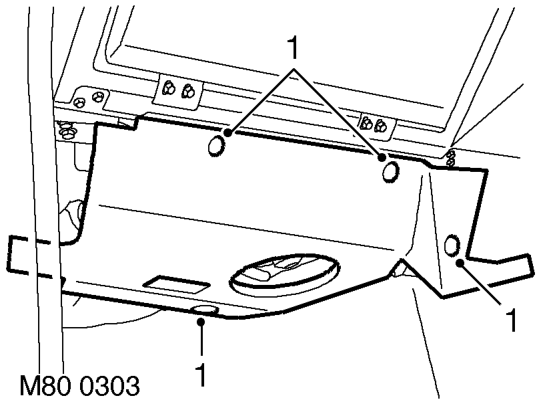
- Remove 4 studs securing toe board and remove toe board.
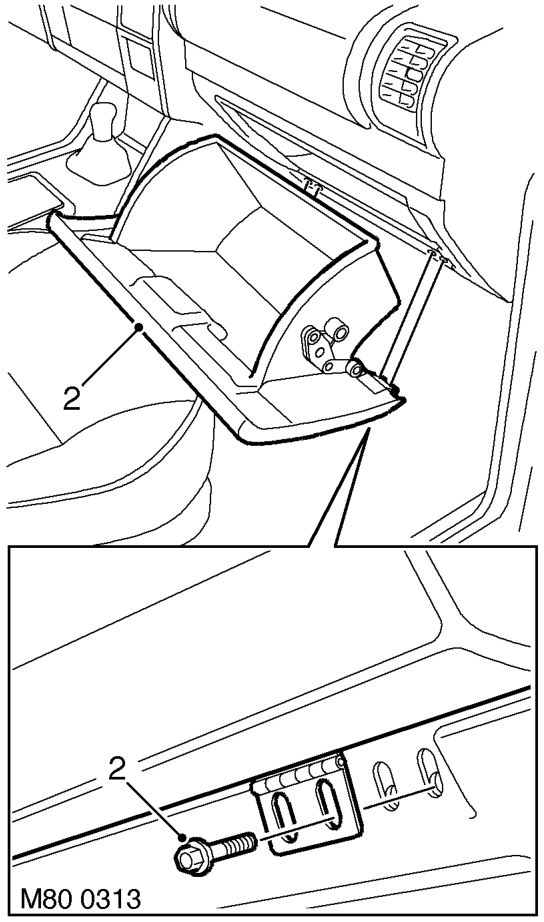
- Remove 4 screws securing glove box, release catch and remove glove box.
- Disconnect battery earth lead.
Parts & tools for this job For Land Rover Discovery
- TOOLA/C manifold gauge setSearch: AC manifold gauge set
- TOOLUV leak detection kitSearch: AC UV leak detection kit
- PARTCabin filterSearch: Land Rover Discovery cabin filter
Links open Amazon search results in a new tab. As an Amazon Associate I earn from qualifying purchases.