
Reassembly
- Make
- Land Rover
- Model
- Discovery II (UK)
- Section
- Overhaul › Reassembly
Transfer box - LT230SEReassembly · page 1 of 2
Reassembly
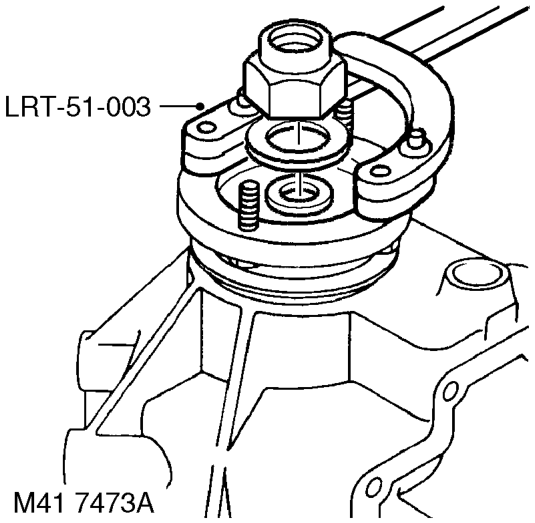
- Position tool LRT-51-003 to output shaft drive flange, remove and discard nut.
- Remove and discard steel and felt washers. Remove output shaft drive flange.
- Using a copper mallet, drive output shaft from housing.
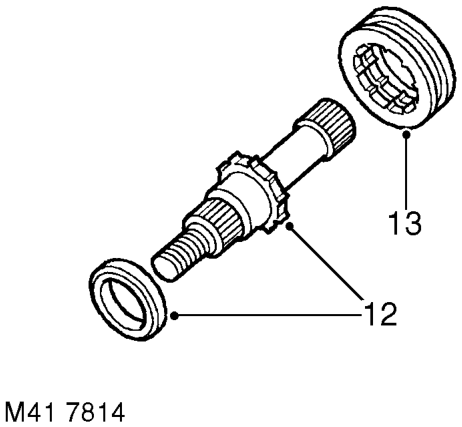
- Compress selector spring and fit retaining clips
- Fit detent ball and spring.
- Apply Loctite 290 to threads of detent plug.
- Fit and tighten detent plug, then unscrew 2
- Fit new 'O' ring to differential lock selector
- Noting its fitted position, remove bearing spacer from output shaft. 15. Fit selector housing, ensure selector finger is
- Noting its fitted position, remove dog clutch from output shaft. 16. Apply Loctite 290 to threads of bolts and tighten
- Remove and discard oil seal from housing.
- Apply sealant, Part No. STC 3254 to front
- Position housing ensuring that output shaft and
- Apply Loctite 290 to threads of bolts.
- Fit front output shaft housing bolts and tighten
- Clean differential lock components.
- Lubricate components with gearbox oil.
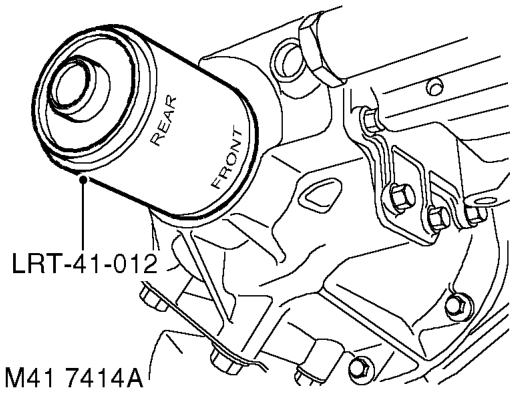
- Using tool LRT-41-012, fit new output shaft oil seal.
- Fit bearing spacer to output shaft with chamfer on spacer towards threaded end.
- Fit dog clutch with flange on clutch facing towards splined end.
- Using a copper mallet, drive output shaft into bearing.
- Compress differential lock selector spring and fit selector fork.
- Position selector fork to groove in dog clutch.
- Fit selector shaft and locate in housing recess, rotate shaft until the two flats for retaining clips are at right angles to the cover plate mating face.
at each end of spring.
CAUTION: Ensure ends of spring are fully seated in recess in clips.
complete turns.
housing.
located in shaft recess.
selector housing bolts to 25 Nm (18 lbf.ft).
output shaft housing.
dog clutch splines are correctly engaged.
in a diagonal sequence to 45 Nm (33 lbf.ft).
Parts & tools for this job For Land Rover Discovery
- TOOLTorque wrenchSearch: 3/8 inch torque wrench
- TOOLSocket setSearch: socket set metric
- BOOKHaynes manualSearch: Haynes manual Land Rover Discovery
Links open Amazon search results in a new tab. As an Amazon Associate I earn from qualifying purchases.