
Reassembly (page 2 of 2)
- Make
- Land Rover
- Model
- Discovery II (UK)
- Section
- Overhaul
Transfer box - LT230SEReassembly · page 2 of 2
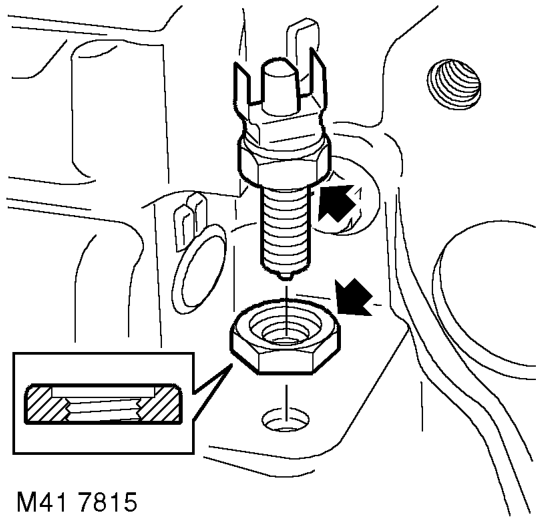
- Clean threads of differential lock warning lamp switch(es).
- Up to 03 MY: Fit nut to switch head with counterbore positioned towards switch head. The nut acts as a spacer to ensure that switch setting is correct. Always ensure that nut is fully tightened to switch head (no gap).
- Apply Hylomar PL 32 sealant to threads of differential warning lamp switch(es).
- Up to 03 MY: Position switch into front output housing until nut bottoms out on housing, tighten nut to 11 Nm (8 lbf.ft).
- 03 MY onwards: Fit new sealing washers to switches, fir switches to front output housing and tighten to 25 Nm (18 lbf.ft).
- Operate differential lock selector lever and check that detent ball can be felt to positively engage/disengage with grooves in shaft. Screw plug in or out until setting is correct.
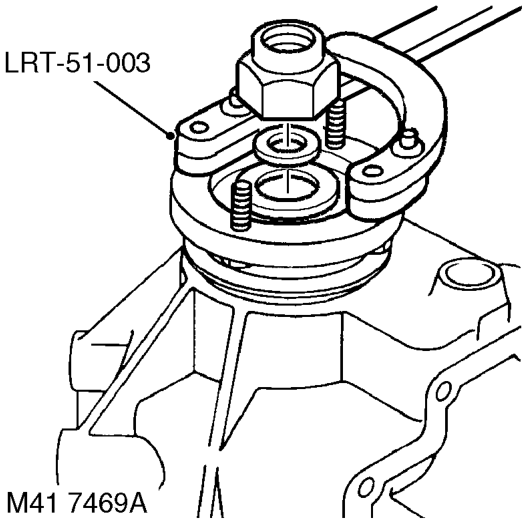
- Fit output flange, new felt and steel washers and new retaining nut.
- Using tool LRT-51-003 to restrain flange, tighten output flange nut to 162 Nm (119 lbf.ft).
Parts & tools for this job For Land Rover Discovery
- TOOLTorque wrenchSearch: 3/8 inch torque wrench
- TOOLSocket setSearch: socket set metric
- BOOKHaynes manualSearch: Haynes manual Land Rover Discovery
Links open Amazon search results in a new tab. As an Amazon Associate I earn from qualifying purchases.