
Switch - wiper and washer - windscreen
- Make
- Land Rover
- Model
- Discovery II (UK)
- Section
- Repairs › Switch - wiper and washer - windscreen
Wipers and washersSwitch - wiper and washer - windscreen
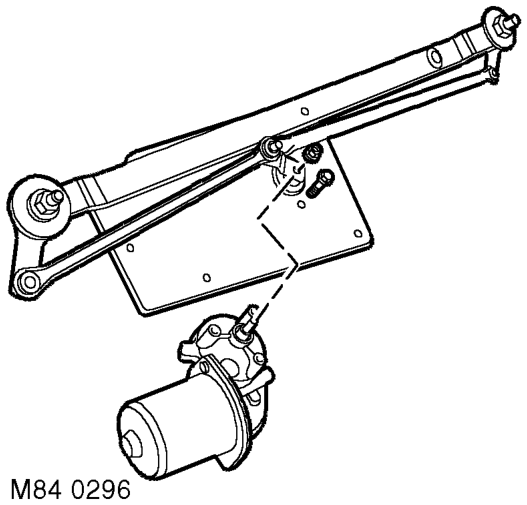
- Remove nut securing linkage connecting rod to wiper motor spindle.
- Release link from motor spindle.
- Remove 3 bolts securing motor to mounting plate and remove motor.
Refit
- Fit new wiper motor to mounting plate and secure with bolts.
- Connect link to motor spindle and tighten nut to 7 Nm (5.2 lbf.ft).
- Fit motor and linkage to body, connect multiplug. Tighten all fixings to 2.5 Nm (1.8 lbf.ft).
- Fit plenum air intake. HEATING AND VENTILATION, REPAIRS, Plenum Air Intake.
Switch - wiper and washer - windscreen
$% 84.15.34
WARNING: It is imperative that before any work is undertaken on the SRS system the appropriate information is read thoroughly.
Remove
- Remove rotary coupler. RESTRAINT SYSTEMS, REPAIRS, Rotary coupler.
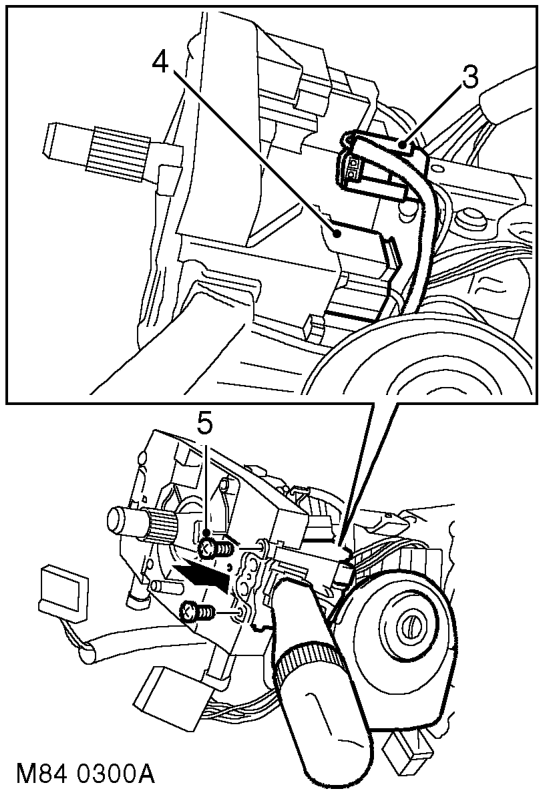
- Release passive coil from steering column lock and lower the coil without disconnecting the harness.
- Release front wiper delay multiplug from column switch mounting bracket and disconnect from harness.
- Disconnect harness multiplug from wiper switch.
- Remove 2 screws securing switch, carefully raise edge of switch bracket to clear location peg and remove switch.
Refit
- Fit new switch to bracket and secure with screws.
- Connect harness multiplug to switch.
Parts & tools for this job For Land Rover Discovery
- TOOLOBD2 scannerSearch: OBD2 scanner
- TOOLDigital multimeterSearch: automotive digital multimeter
- TOOLBack-probe test leadsSearch: back probe test leads
Links open Amazon search results in a new tab. As an Amazon Associate I earn from qualifying purchases.