
All engines (page 4 of 5)
- Make
- Land Rover
- Model
- Freelander Workshop Manual
- Year
- 1998–2000
- Section
- Repairs
Engine - K SeriesAll engines · page 4 of 5
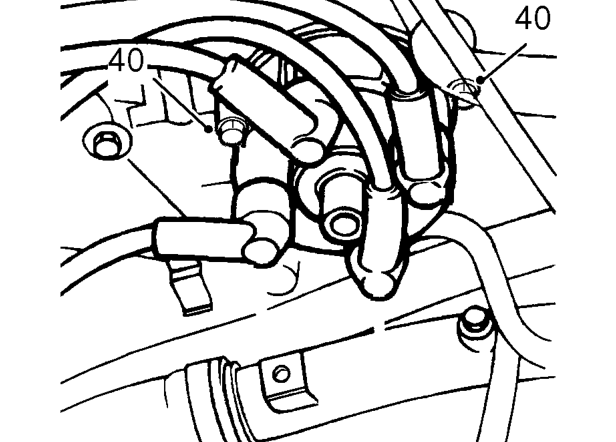
- Remove 2 screws securing distributor cap and remove distributor cap.
- Remove camshaft cover, See this section.
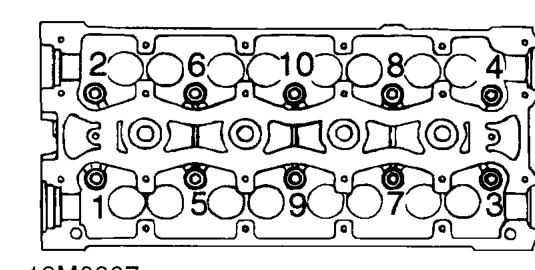
- Working in the sequence shown, loosen 10 cylinder head to oil rail bolts.
- Remove cylinder head bolts and store in fitted order.
- Using assistance, remove cylinder head assembly from cylinder block.
CAUTION: Take care not to damage heated oxygen sensor when removing cylinder head.
CAUTION: Cylinder head is dowel located; do not tap it sideways to free it from cylinder block. Place cylinder head on wooden blocks to prevent damage to valves.
CAUTION: Removal of cylinder head bolts will result in a ’tightening up’ of the crankshaft. Rotation of the crankshaft must, therefore, be kept to a minimum. Do not rotate until cylinder liner clamps LRT-12-144 are fitted.
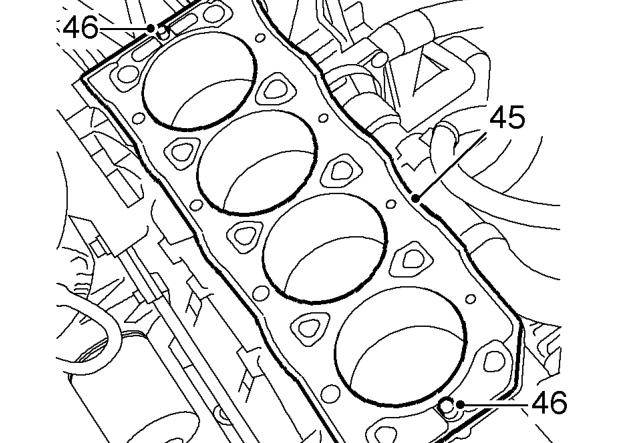
- Remove and discard cylinder head gasket from cylinder block.
- Remove 2 location dowels from cylinder block.
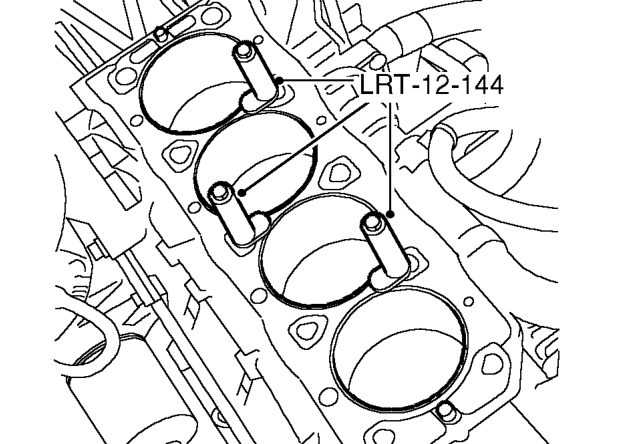
- Fit cylinder liner clamps LRT-12- 144 to cylinder block and secure with cylinder head bolts.
CAUTION: Do not rotate crankshaft with cylinder head removed.
Parts & tools for this job For 1998 Land Rover Freelander
- PARTEngine gasket setSearch: Land Rover Freelander 1998 engine gasket set
- TOOLTorque wrenchSearch: 3/8 inch torque wrench
- TOOLFeeler gauge setSearch: feeler gauge set
Links open Amazon search results in a new tab. As an Amazon Associate I earn from qualifying purchases.