
Rear damper (page 3 of 3)
- Make
- Rover
- Model
- 400 Workshop Manual
- Year
- 1995–2000
- Section
- Repairs
SuspensionRear damper · page 3 of 3
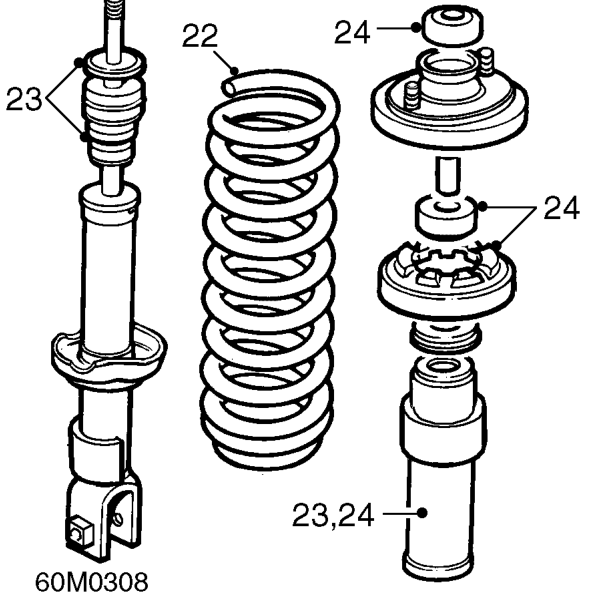
- Loosen spring compressor and remove spring.
- Remove dust cover bump stop plate, bump stop from damper.
- Inspect dust cover and spring mounting rubbers for deterioration and damage.
Refit
- Fit spring to compressor.
- Fit bump stop, bump stop plate and dust cover to damper.
- Fit damper to spring ensuring fork is vertical and spring stop is to rear.
- Compress spring.
- Fit spring mounting plate ensuring studs are vertical, fit washer and NEW nut.
- Hold shaft with Allen key and tighten nut to 29 Nm.
- Release tension ensuring spring mounting plate and damper are aligned.
- Remove spring and damper assembly from spring compressor.
- Remove spring compressor from vice.
- Fit and align spring and damper assembly to vehicle ensuring nut on fork faces to the front. Fit new top mounting nuts, DO NOT tighten.
- Raise the lower arm and fit damper bolt, DO NOT tighten.
- Support lower arm with jack and fit bolt securing lower arm to trailing arm, DO NOT tighten.
- Raise jack to support weight of vehicle, tighten damper top mounting nuts to 38 Nm and fit cover.
- Tighten bolts securing lower arm to trailing arm to 47 Nm.
- Tighten damper to lower arm bolts to 47 Nm.
- Remove jack.
- Fit road wheel(s) and tighten nuts to correct torque. See INFORMATION, Torque wrench settings.
- Remove stand(s) and lower vehicle.
- Position boot side carpet and secure to retaining tags.
- Locate ’D’ post finisher to carpet retainer and engage retaining clips, secure with screws and fastener.
- Fit rubber to rear squab catch striker.
- Position parcel tray support panel and engage clips, fit retaining screw.
- Fit parcel shelf and secure support straps.
- Refit rear seat squab. See BODY, Seats and seat belts.
Parts & tools for this job For 1995 Rover 400
- TOOLCoil spring compressorSearch: coil spring compressor
- TOOLBall joint separatorSearch: ball joint separator
- PARTRear shock absorbersSearch: Rover 400 1995 rear shock absorbers
Links open Amazon search results in a new tab. As an Amazon Associate I earn from qualifying purchases.