
Gasket - cylinder head (page 3 of 9)
- Make
- Land Rover
- Model
- Discovery II (UK)
- Section
- Overhaul
Engine - Td5Gasket - cylinder head · page 3 of 9
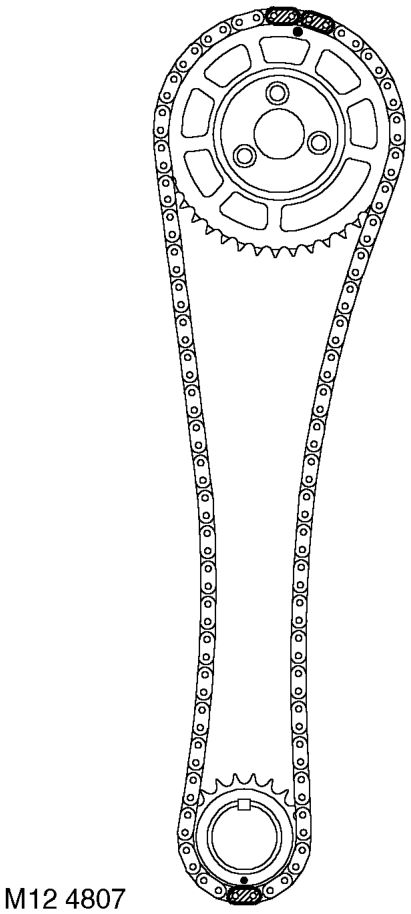
- Ensure engine is set to TDC firing - No.1 cylinder.
- Check that mark on camshaft sprocket is positioned between the 2 coloured links on timing chain.
- Position sprocket to camshaft, fit and lightly tighten 3 new bolts then loosen bolts half a turn.
- Clean fixed guide Allen screw and apply Loctite 242 to screw threads.
- Fit fixed timing chain guide Allen screw and tighten to 25 Nm (18 lbf.ft).
- Clean timing chain tensioner and fit new sealing washer.
- Fit timing chain tensioner and tighten to 45 Nm (33 lbf.ft).
- Tighten camshaft sprocket bolts to 37 Nm (27 lbf.ft).
- Remove tool LRT-12-058 from camshaft.
- Lubricate a new 'O' ring with engine oil and fit to camshaft sprocket access plug.
- Fit camshaft sprocket access plug.
- Clean alternator/vacuum pump oil hose union.
- Lubricate a new 'O' ring with engine oil and fit to alternator/vacuum pump oil hose union.
- Fit and tighten alternator/vacuum pump oil hose union to 10 Nm (7 lbf.ft).
- Fit bolt securing alternator strap bracket to cylinder head and tighten to 25 Nm (18 lbf.ft).
- Connect multiplugs to ECT sensor and EUI's.
CAUTION: Following cylinder head overhaul, it will be necessary, before fitting the camshaft cover to adjust the fuel injector rockers using the following procedures:
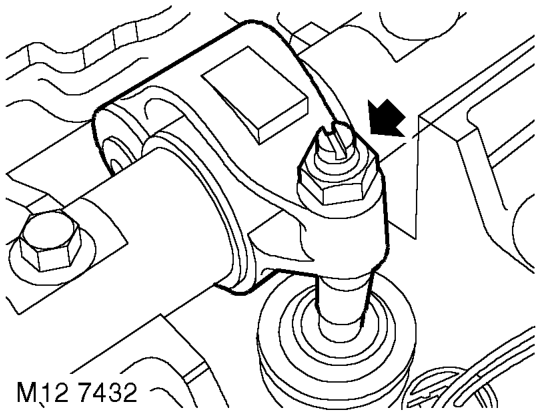
- Rotate engine clockwise until No.1 EUI lobe is at full lift.
- Tighten No.1 rocker adjusting screw until the EUI plunger is felt to 'bottom out'.
- Loosen rocker adjusting screw 1 complete turn to give EUI plunger the required bump clearance and tighten rocker adjusting screw to 16 Nm (12 lbf.ft).
CAUTION: Ensure screw does not turn as locknut is tightened.
- Carry out the above procedures for the remaining 4 rocker arms.
- After completion of rocker adjustment, slowly rotate engine clockwise 2 complete turns by hand to ensure that no EUI's are bottoming out on their plungers.
- Clean camshaft cover and mating face.
- Fit new sealing washers and isolators as necessary to camshaft cover.
- Fit new camshaft cover gasket to cover.
CAUTION: Gasket must be fitted dry.
Parts & tools for this job For Land Rover Discovery
- PARTEngine gasket setSearch: Land Rover Discovery engine gasket set
- TOOLTorque wrenchSearch: 3/8 inch torque wrench
- TOOLFeeler gauge setSearch: feeler gauge set
Links open Amazon search results in a new tab. As an Amazon Associate I earn from qualifying purchases.