
Gasket - cylinder head (page 5 of 9)
- Make
- Land Rover
- Model
- Discovery II (UK)
- Section
- Overhaul
Engine - Td5Gasket - cylinder head · page 5 of 9
- Loosen locknuts and fully unscrew rocker adjusting screws; discard locknuts and screws.
- Remove and discard 6 bolts securing rocker shaft, release shaft from locating dowel and remove shaft.
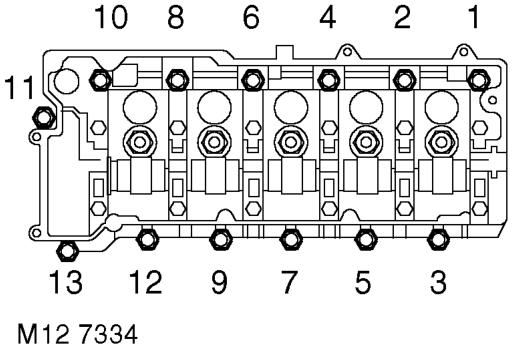
- Using sequence shown, progressively loosen 13 bolts securing camshaft carrier to cylinder head until valve spring pressure is released; remove bolts. Do not discard bolts at this stage.
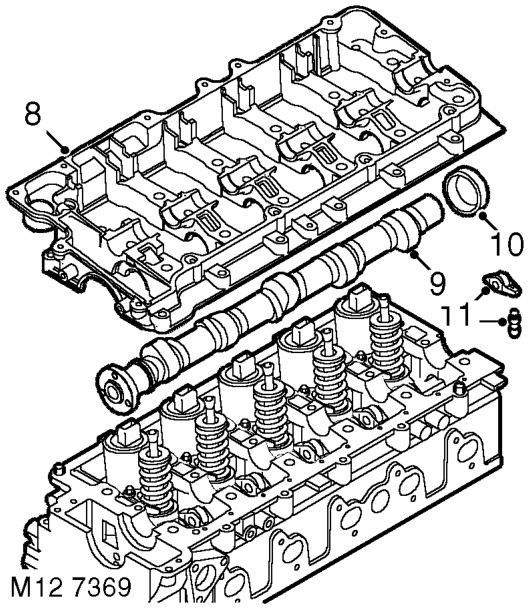
- Gently tap camshaft carrier upwards to break sealant bond, release carrier from locating dowels; remove carrier.
- Remove camshaft.
- Remove and discard camshaft rear oil seal.
- Remove finger followers and lash adjusters.
CAUTION: Store lash adjusters in their fitted order and store upright. Maintain absolute cleanliness when handling lash adjusters. Failure to observe these precautions can result in engine failure.
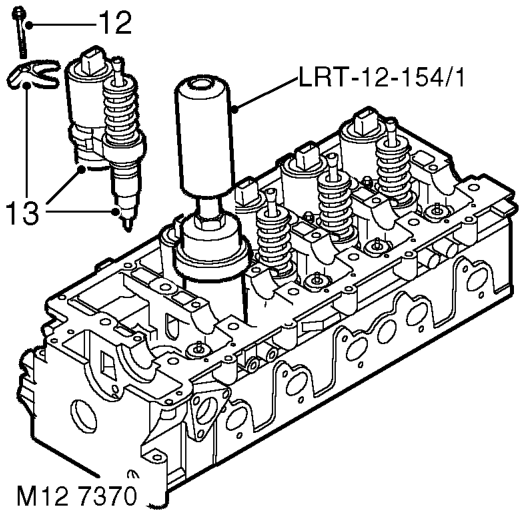
- Remove and discard 5 bolts securing EUI retainers.
- Using tool LRT-12-154/1 remove EUI units from cylinder head and collect retainers; remove reaction posts. Keep components in their fitted order.
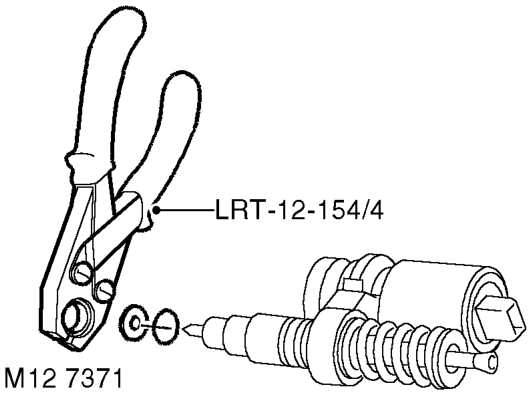
- Using tool LRT-12-154/4, remove and discard sealing washer and 'O' ring from each injector unit.
- Support cylinder head clear of valves, use a hollow drift and tap each spring cap to free collets.
Parts & tools for this job For Land Rover Discovery
- PARTEngine gasket setSearch: Land Rover Discovery engine gasket set
- TOOLTorque wrenchSearch: 3/8 inch torque wrench
- TOOLFeeler gauge setSearch: feeler gauge set
Links open Amazon search results in a new tab. As an Amazon Associate I earn from qualifying purchases.