
Reassembly (page 7 of 9)
- Make
- Land Rover
- Model
- Discovery II (UK)
- Section
- Overhaul
Transfer box - LT230SEReassembly · page 7 of 9
- Make suitable alignment marks between high/ Disassembly low selector sleeve and hub, remove selector sleeve.
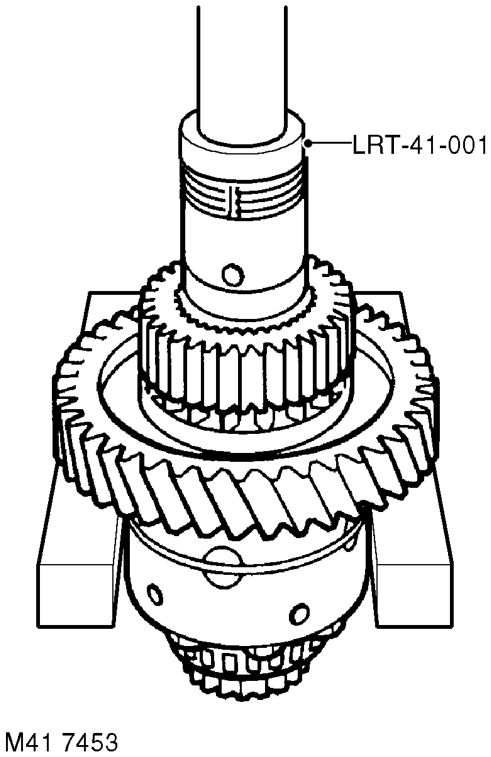
- Using a suitable press and thrust button LRT- 41-001 remove high/low hub and low range gear.
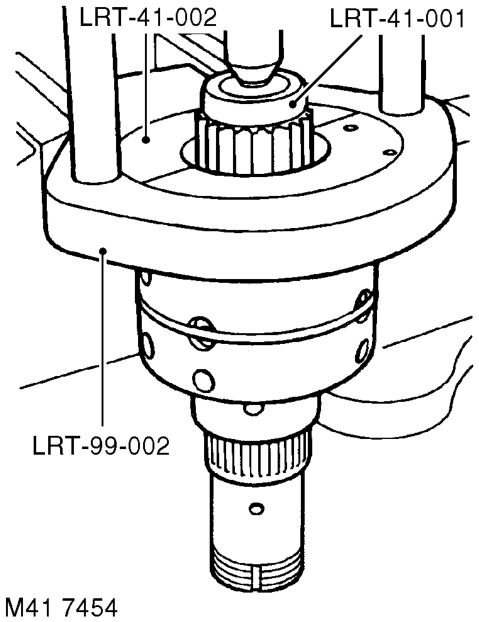
- Remove and discard thrust washer.
- Position tool LRT-41-002 around front differential bearing and tool LRT-41-001 thrust button to differential shaft and press off bearing.
- Secure rear half of differential carrier in a soft jawed vice.
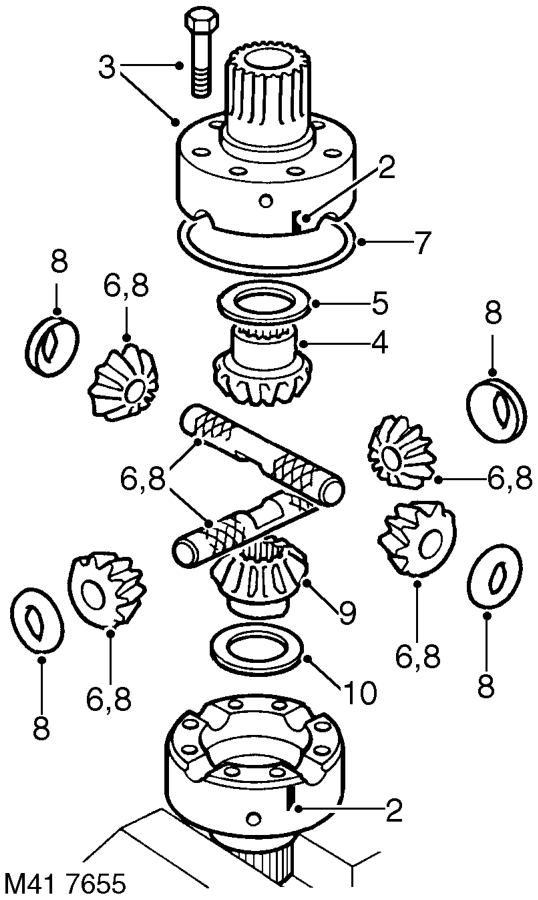
- Make suitable alignment marks between front and rear halves of differential carrier.
- Remove 8 bolts securing front half of carrier to rear and separate both halves of carrier.
- Suitably identify front sun gear to front half of carrier, then remove sun gear.
- Remove and discard thrust washer.
- Suitably identify each planet gear to its shaft and fitted position of each cross shaft to rear half of carrier
- Remove retaining ring.
- Remove planet gears and cross shafts, remove and discard dished thrust washers.
- Suitably identify rear sun gear to rear half of carrier, then remove sun gear.
Parts & tools for this job For Land Rover Discovery
- TOOLTorque wrenchSearch: 3/8 inch torque wrench
- TOOLSocket setSearch: socket set metric
- BOOKHaynes manualSearch: Haynes manual Land Rover Discovery
Links open Amazon search results in a new tab. As an Amazon Associate I earn from qualifying purchases.