
Original page
- Make
- Rover
- Model
- 600 Rover 600 Repair Manual - Volumes 1 and 2 - 2nd Edition
- Section
- Interior fittings › Original page
BodyOriginal page
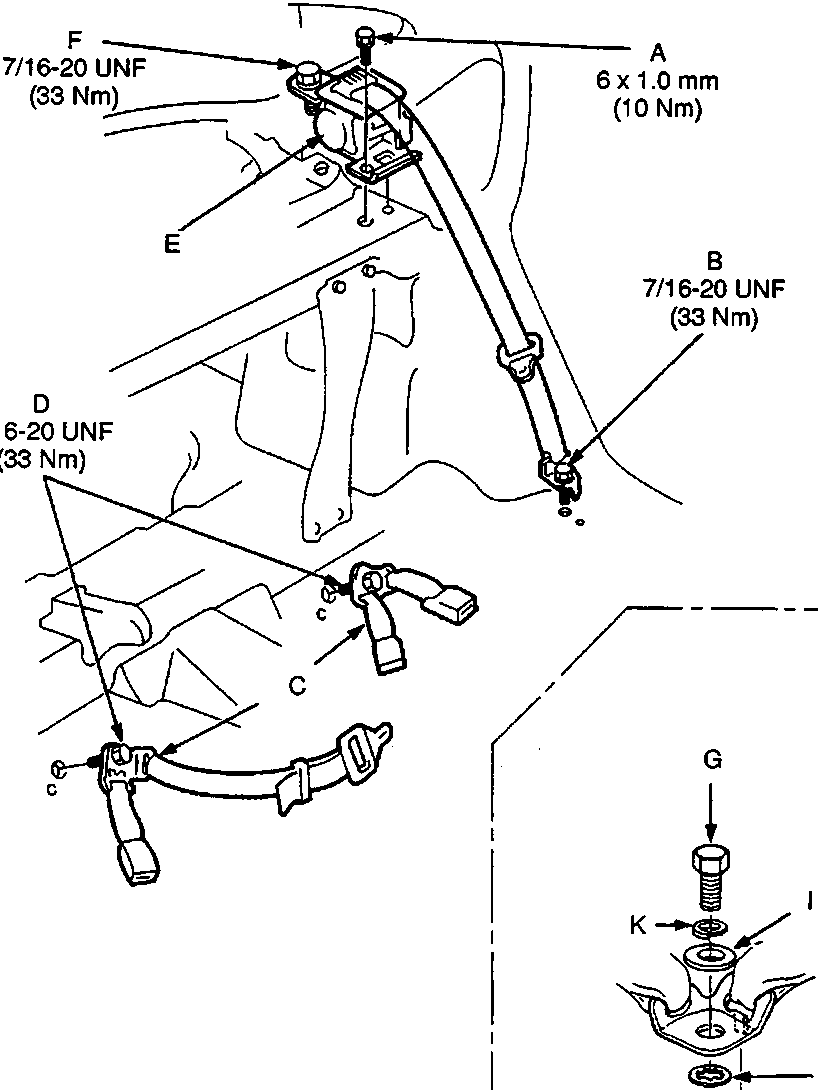
76M 0931
| A Retractor mounting bolt B Lower anchor bolt C Centre belts D Centre anchor bolts E Retractor F Retractor bolt |
Anchor bolt construction G Centre anchor bolt H Lower anchor bolt I Plain washer J Toothed lock washer K Spring washer |
CAUTION: Check the rear seat belts for damage and replace them if necessary. Be careful not to damage them during removal and installation.
- Remove:
- Rear seat-back.
- Rear shelf.
- Remove the all anchor bolts, the retractor bolt and retractor mounting bolt, then remove the rear seat belts and centre belts.
- Check that the retractor locking mechanism functions correctly..
- Installation is the reverse of the removal procedure.
Note: When removing the anchor bolts and retractor bolt, use a 17 mm socket or box-end wrench.
Note:
- Before attaching the rear shelf and rear seat, make sure there are no twists or kinks in the seat belt.
- Pass the seat belts through the seat belt guides of the rear seat cushion.
Original page
Parts & tools for this job For Rover 600
- TOOLTrim removal tool kitSearch: trim removal tool kit
- PARTTouch-up paintSearch: Rover touch up paint
- PARTPanel clip assortmentSearch: Rover panel clips assortment
Links open Amazon search results in a new tab. As an Amazon Associate I earn from qualifying purchases.