
Front Seat Removal
- Make
- Rover
- Model
- 600 Rover 600 Repair Manual - Volumes 1 and 2 - 2nd Edition
- Section
- Interior fittings › Front Seat Removal
BodyFront Seat Removal
Note:
• Take care not to bend the headliner.
- Be careful not to damage the dashboard and other interior trim.
- Installation is the reverse of the removal procedure.
Note:
- When installing the headliner through the door opening, be careful not to fold or bend it. Also, be careful not to scratch the body.
- Check that both sides of the headliner are securely attached to the trim.
Front Seat Removal
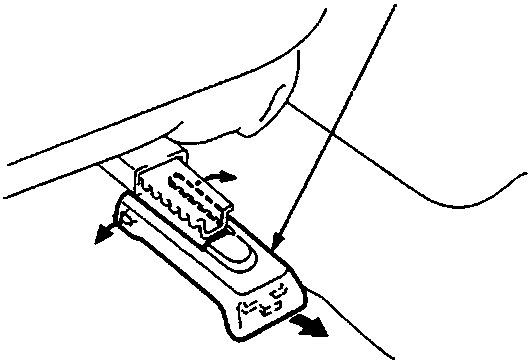
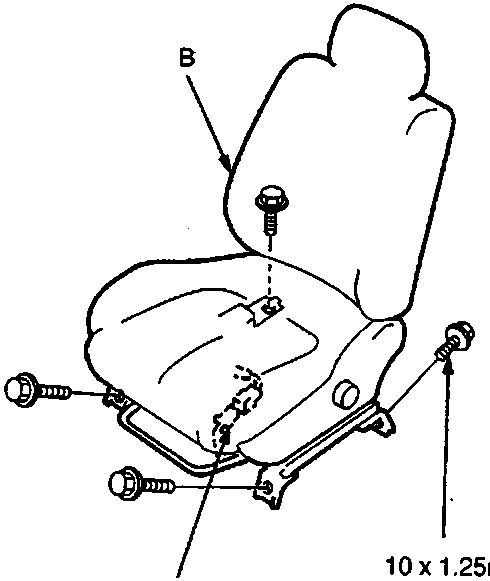
76M 0898
- A Seat track end cover
- B Front seat
- C Connector
Note: Take care not to scratch the seat covers and body.
- Remove the seat track end cover.
- Remove the bolts, then remove the front seat.
Note: Disconnect the connectors (power height seat and heated seat).
- Installation is the reverse of the removal procedure.
Parts & tools for this job For Rover 600
- TOOLTrim removal tool kitSearch: trim removal tool kit
- PARTTouch-up paintSearch: Rover touch up paint
- PARTPanel clip assortmentSearch: Rover panel clips assortment
Links open Amazon search results in a new tab. As an Amazon Associate I earn from qualifying purchases.