
Front door trim pad
- Make
- Rover
- Model
- Coupé, Cabriolet & Tourer 200/400 Coupé, Cabriolet & Tourer Workshop Manual
- Section
- Doors › Front door trim pad
BodyFront door trim pad
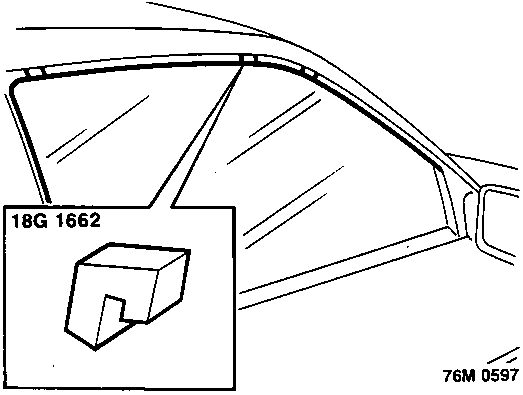
- Fit 3 glass alignment blocks 18G 1662 to glass in positions shown.
- Close door and attach suction cup lifters to glass.
- With assistance, align top faces of alignment blocks to seal channel and tighten 2 upper mounting bolts to 25 Nm.
- With assistance, press on top edge of door glass until side faces of blocks contact seal channel. Turn alignment studs until flanges just contact door inner panel.
- Fit nuts to alignment studs. Hold studs with Allen key to prevent rotation whilst lower mounting nuts are tightened to 25 Nm.
- Tighten remaining upper mounting bolts and tighten to 25 Nm.
- Open door and remove alignment blocks.
- Fit door trim pad, see Front door trim pad.
- Fit door glass seal and secure studs.
FRONT DOOR TRIM PAD
Service Repair No. 76.34.01
Service Repair No. Armrest 76.34.22
Remove
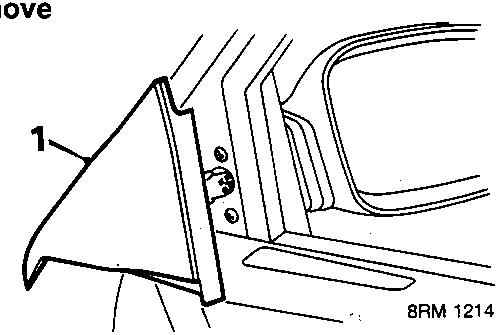
- Open door, remove cheater panel from door.
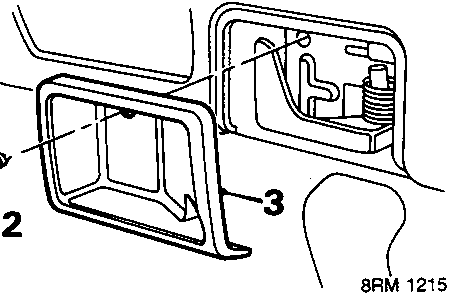
- Remove screw, interior door handle escutcheon.
- Remove escutcheon.
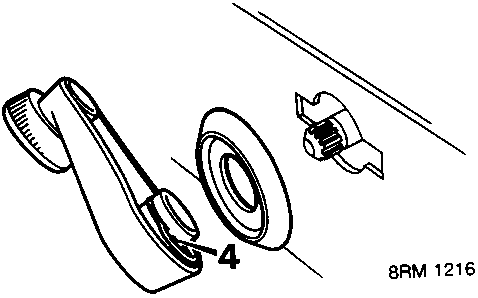
- Manual window: Release clip from between regulator handle and escutcheon using a wire hook, remove regulator handle and escutcheon.
Parts & tools for this job For Rover Coupé, Cabriolet & Tourer
- TOOLTrim removal tool kitSearch: trim removal tool kit
- PARTTouch-up paintSearch: Rover touch up paint
- PARTPanel clip assortmentSearch: Rover panel clips assortment
Links open Amazon search results in a new tab. As an Amazon Associate I earn from qualifying purchases.