
Refit
- Make
- Rover
- Model
- Coupé, Cabriolet & Tourer 200/400 Coupé, Cabriolet & Tourer Workshop Manual
- Section
- Doors › Refit
BodyRefit · page 1 of 2
Refit
Central locking motor
- Fit spacer and motor to latch.
- Secure motor to latch with screws.
All models
- Position latch assembly to door and secure link rod to exterior handle.
CAUTION: Take care not to disturb setting of threaded link.
- Position exterior handle to door aperture and secure with screws.
- Fit link rods to latch and secure clips.
- Fit tape over access hole.
- Secure latch to door with screws.
- Secure motor fly – lead clip to door.
- Fit spacer to window rear guide channel and fit bolt finger tight.
- Temporarily fit window regulator handle, then lower and raise window to centralise channel before tightening bolt.
- Connect motor fly – lead and secure connector clip to door.
- Fit plastic sheet to door.
- Fit door trim pad, see Rear door trim pad.
PRIVATE DOOR LOCK
Service Repair No. 76.37.39
Note: Later models only have a private door lock in the drivers door.
Remove
- Fully raise window.
- Remove door trim pad, see Front door trim pad.
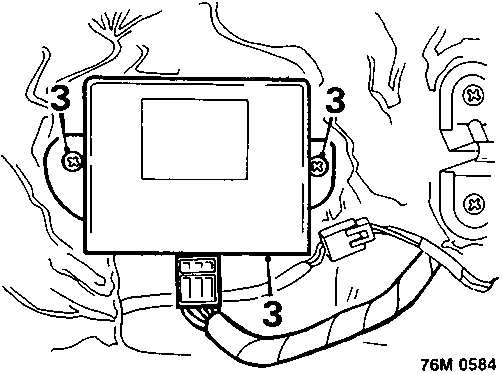
- 4 and 5 door models: Remove 2 screws securing window control unit, if fitted, position unit aside.
- Release plastic sheet from rear of door.
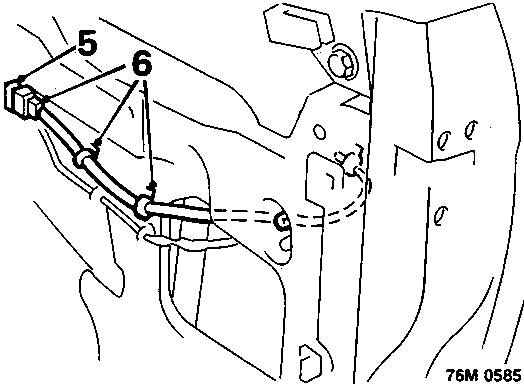
Central locking
- Disconnect multiplug from door lock switch fly – lead.
- Release multiplug and fly – lead clips from door.
Parts & tools for this job For Rover Coupé, Cabriolet & Tourer
- TOOLTrim removal tool kitSearch: trim removal tool kit
- PARTTouch-up paintSearch: Rover touch up paint
- PARTPanel clip assortmentSearch: Rover panel clips assortment
Links open Amazon search results in a new tab. As an Amazon Associate I earn from qualifying purchases.