
Bumper assembly - rear - from 03MY (page 2 of 2)
- Make
- Land Rover
- Model
- Discovery II (UK)
- Section
- Repairs
‹ Prev Bumper assembly - rear - from 03MYNext › Trim finisher - bumper - front - from 03MY Bumper assembly - rear - up to 03MY
Exterior fittingsBumper assembly - rear - from 03MY · page 2 of 2
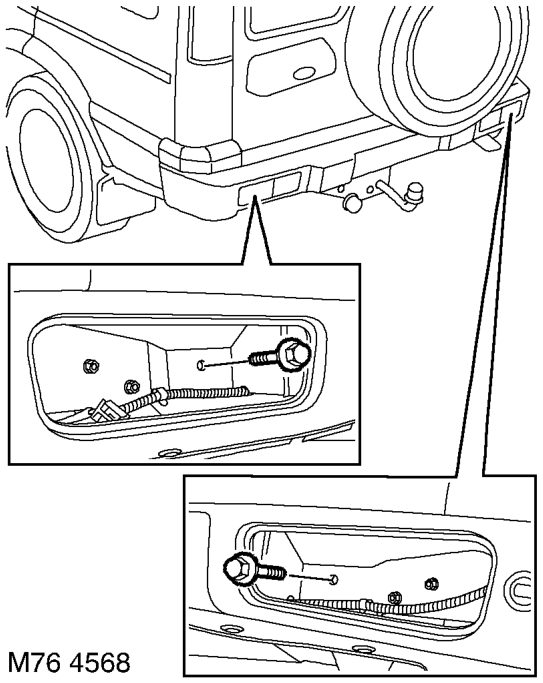
- Remove 2 bolts securing bumper.
- With assistance remove bumper. NOTE: Do not carry out further dismantling if component is removed for access only.
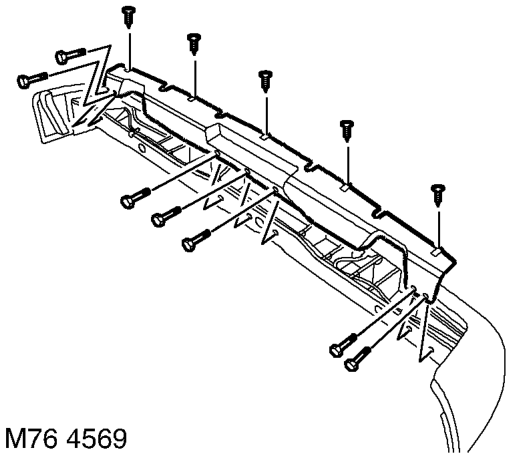
- Remove 7 bolts and 5 screws securing closing panel and remove panel.
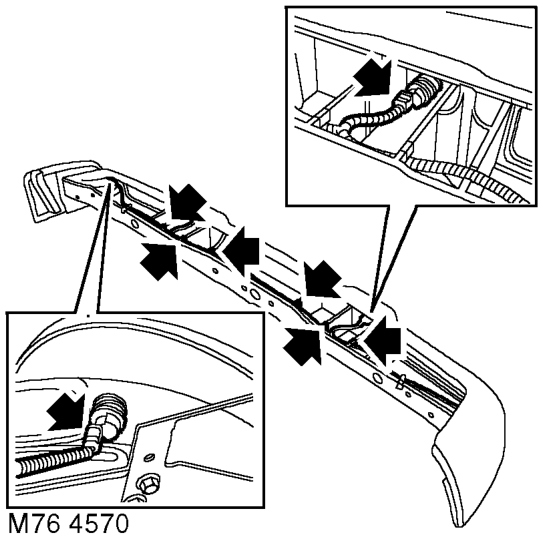
- Disconnect 4 park distance control sensor harness multiplugs and remove 6 clips retaining harness.
- Release 3 clips retaining harness and remove harness.
- Noting their fitted positions, release and remove 4 park distance control sensors and sensor housings.
Refit
- Fit sensor housings to bumper, ensuring lugs on housings are aligned with cut-outs in bumper.
- Fit and secure sensors to housings.
- Fit harness, secure with clips and connect multiplugs
- Fit closing panel and secure with bolts and screws.
- With assistance, fit bumper assembly to body.
- Fit bolts securing bumper and tighten to 45 Nm (33 lbf.ft).
- Secure rear lamp harness clips and connect park distance control sensor harness multiplug.
- Fit both rear tail lamps. LIGHTING, REPAIRS, Lamp - tail/ flasher - bumper.
‹ Prev Bumper assembly - rear - from 03MYNext › Trim finisher - bumper - front - from 03MY Bumper assembly - rear - up to 03MY
Parts & tools for this job For Land Rover Discovery
- TOOLTrim removal tool kitSearch: trim removal tool kit
- PARTTouch-up paintSearch: Land Rover touch up paint
- PARTPanel clip assortmentSearch: Land Rover panel clips assortment
Links open Amazon search results in a new tab. As an Amazon Associate I earn from qualifying purchases.