
Louvre panel assembly - centre fascia (page 2 of 4)
- Make
- Land Rover
- Model
- Discovery II (UK)
- Section
- Repairs
Interior trim componentsLouvre panel assembly - centre fascia · page 2 of 4
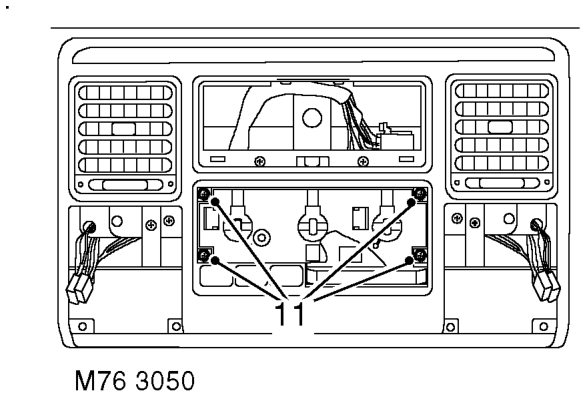
- Models without A/C: Remove 4 screws securing heater control panel to louvre panel.
- Loosen 2 upper screws and remove 4
- Remove louvre panel assembly.
- Remove seals from face level vents.
Refit
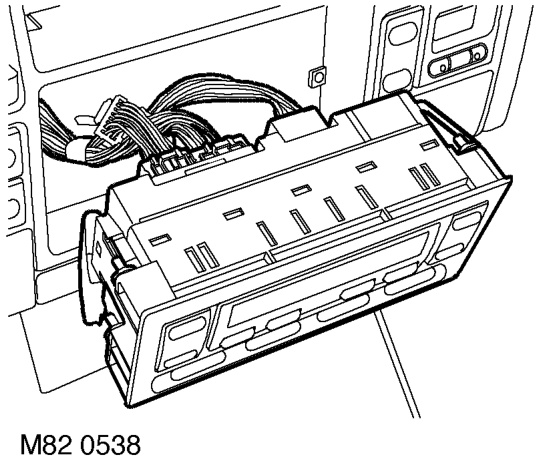
- Models with A/C: Carefully release ATC ECU from louvre panel, disconnect multiplugs and remove ATC ECU.
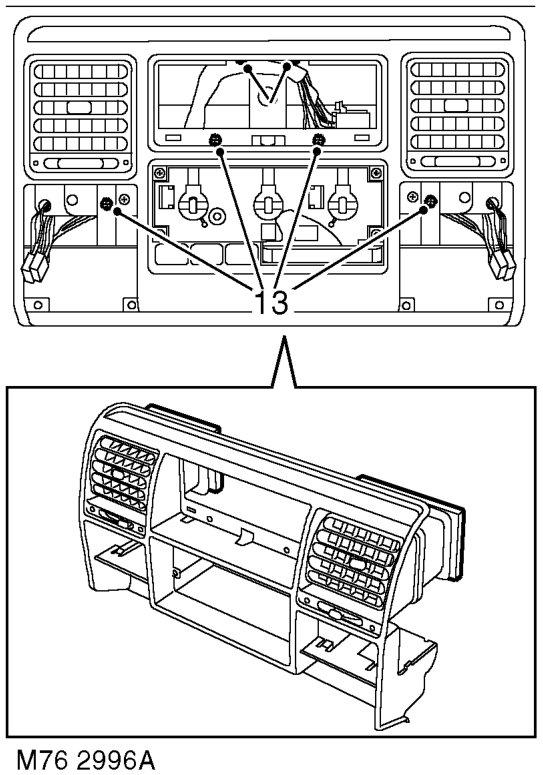
remaining screws securing louvre panel to fascia.
- Fit seals to face level vents on new louvre panel.
- Fit louvre panel to fascia and secure with screws.
- Models with A/C: Connect multiplugs to ATC ECU and fit ATC ECU to fascia.
- Models without A/C: Fit screws securing heater control panel to louvre panel.
- Models without A/C: Fit heater control panel graphic plate and secure with screws.
- Models without A/C: Fit blower speed and heater control knobs.
- Position switch pack, connect multiplugs to switches and fit switch pack to louvre panel.
- Position clock assembly, connect multiplug to clock and door locking switch and fit clock assembly to louvre panel.
Parts & tools for this job For Land Rover Discovery
- TOOLTrim removal tool kitSearch: trim removal tool kit
- PARTTouch-up paintSearch: Land Rover touch up paint
- PARTPanel clip assortmentSearch: Land Rover panel clips assortment
Links open Amazon search results in a new tab. As an Amazon Associate I earn from qualifying purchases.